Audi A8 Front and Rear Door Trim Removal
By Jim Riticher and Paul Waterloo
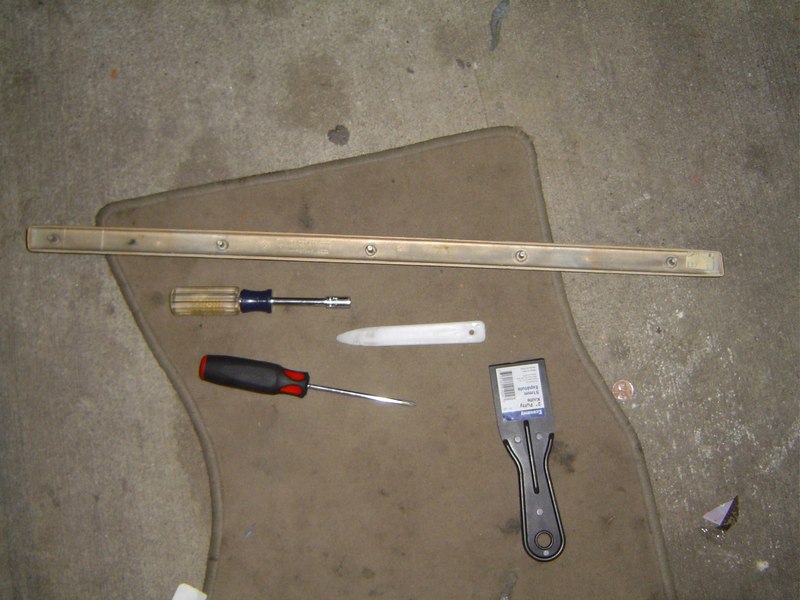
Note 1: You MUST HAVE a nylon trim stick to do this. I expect that if you try to get by with a screwdriver, you will booger something up.
Note 2: The Bentley CD misses about half the fasteners needed to remove the trim. If you're reading the manual, and looking at this, that's why they're so different.
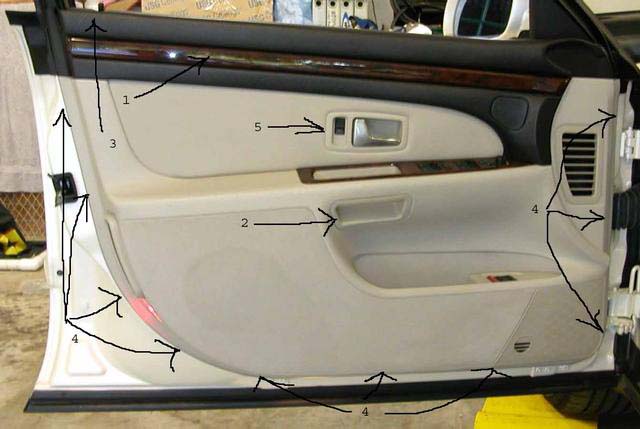
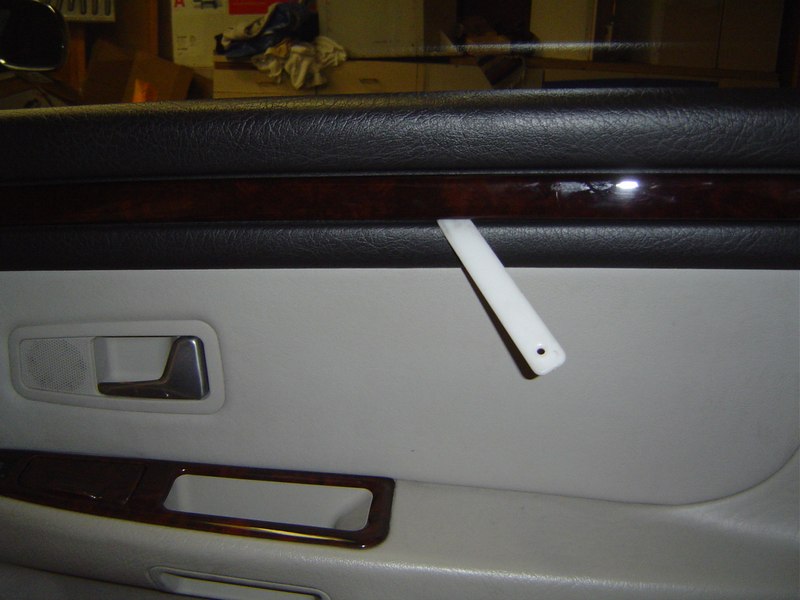
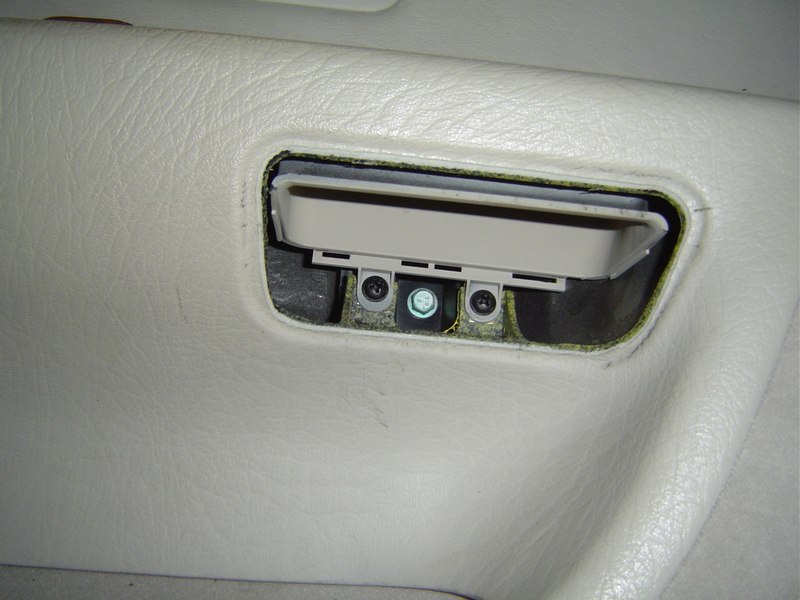
Pry off the wood trim with a nylon trim stick. This will reveal 3 large Phillips head screws that are a major part of what holds the trim to the door. These screws are not mentioned by Bentley. See pictures below of 97 door panel which has push connectors versus screws.
Pry off the lower door handle cover with a trim stick. This will reveal 2 screws that, when removed, allow removal of the upper door handle cover. Beneath that are two larger screws that attach the door handle to the door.
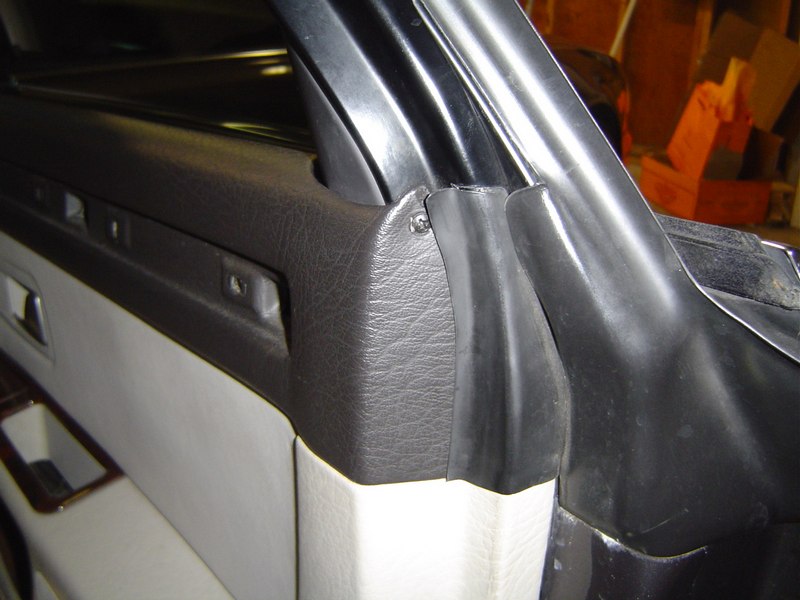
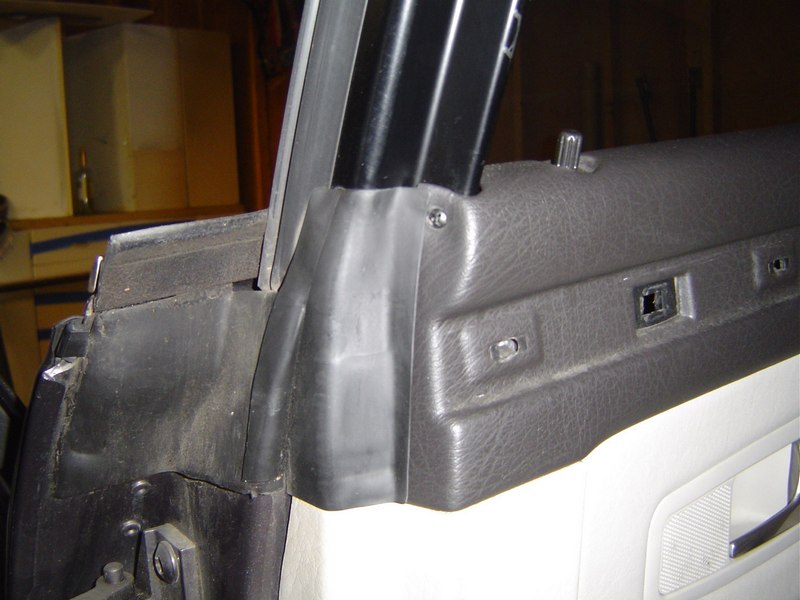
You'll need to lock the door, so you can work the top of the door trim over the pop-up. To the left of the arrow, there's a little Phillips screw in the door end at the trim that you'll need to remove.
There are a zillion plastic pop-ons around the lower perimeter of the door. Start at one end with the trim stick, and pop off the trim panel.
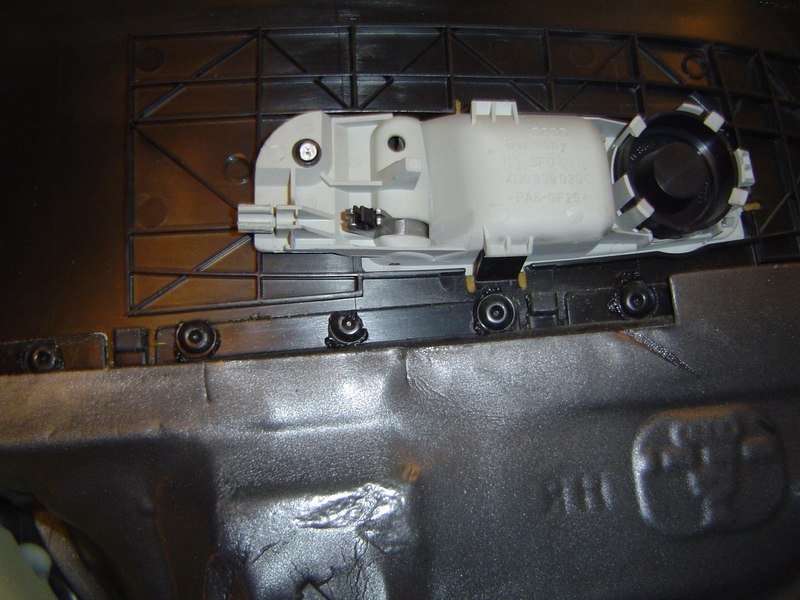
Once you get the trim panel loose, there's a cute little mechanism connecting the door handle to the door locks. Lots of small parts. Examine carefully before you remove. You may not need to, for what you're doing.
Rear Door Panel Removal
A lot of these procedures are applicable to the above front door procedure.
Here are the tools you will need, it also includes an 8mm socket if you want to totally remove the panel.
Remove wood trim with trim stick, start at one side and move to the other. Pop each nipple one at a time, be gentle.
Back of wood piece.
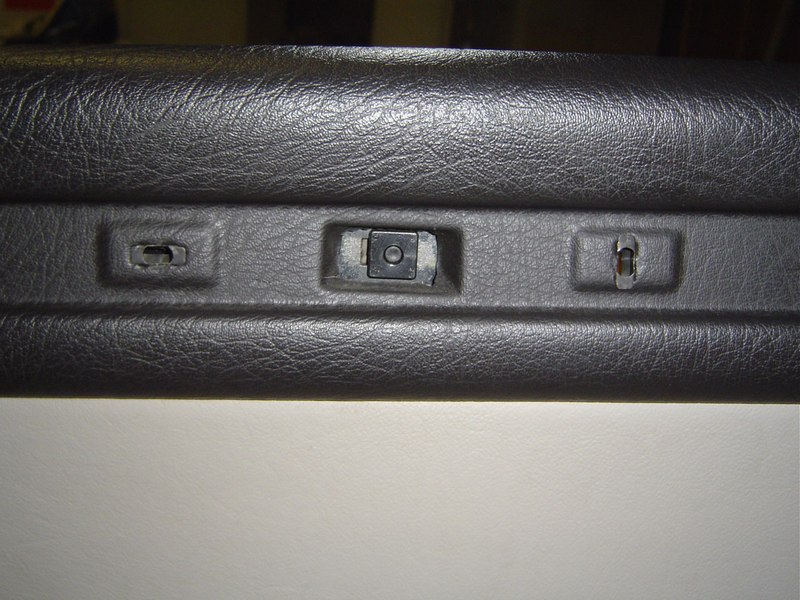
The wood trim inserts into the two outer pieces shown here, the 97 A8 had this "push connectors", you have to push the pin through with an awl and recover the pin later. Or have new ones on hand. On later cars, they were large Phillips head screws.
Remove the trim piece around the lower door handle cover, be careful. It's difficult to get this piece inserted back in correctly, you might need to tap it with a rubber mallet and either use a rag or you'll have a big scuff mark.
Remove the two Phillips head screws.
Remove the 10mm? or 8mm? screw also.
Remove front and rear Phillips head screws at top of panel.
Remove wood/window switch insert, disconnect wires if you are going to remove the door panel.
You'll have to disconnect the cable going to the door linkage, here is a picture for reference. The cable ferrule fits into the black piece. It will probably fall out when you remove the cable so keep an eye out for it.
Installation is opposite of removal, you can get replacement parts at the dealer.