Audi A8 F125 Transmission
Switch Replacement
By Dan Mac
Problem
The F125 switch is a multi-function, multi-wafer electrical switch mounted on the side of the transmission. It is in the following circuits: gear selection through the TCU, cruise control, back up light, mirror dipping circuit and maybe more. This procedure was developed because the transmission was going into "limp home mode" on occassion. The fault code showed that it was a problem with the F125 switch. It can corrode over time or get soaked with oil.
Time
There was plenty of trial and error since I do not have a Bentley, but I have worked on cars throughout my life and I was able to figure it out. I started pulling tools and jacking the car up @ 4:30pm and was done putting tools away @ 12:30am. I did have take a few brakes and had some dinner during this time. Working with my step by step procedure it should take no more than 5 hours total.
Parts Required
The part is about $300 and can be bought from www.ecstuning.com.
Tools Required
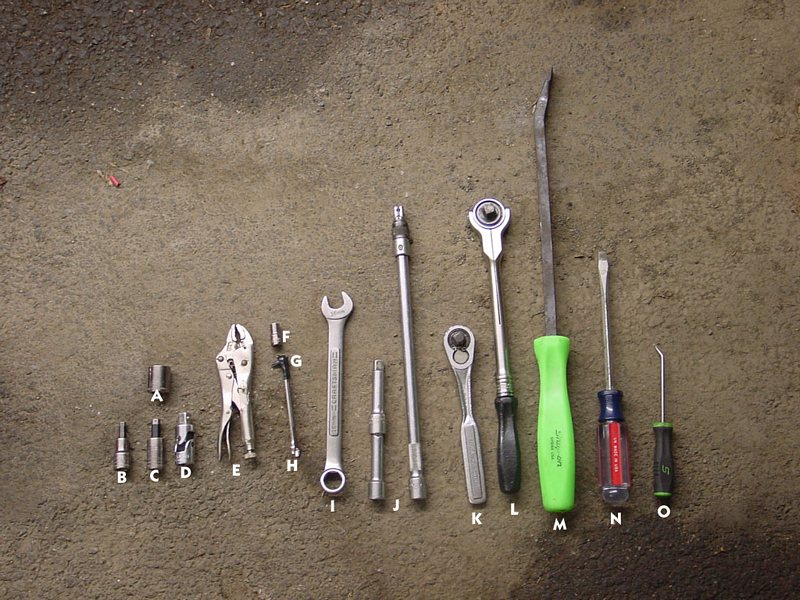
A= 16mm socket
B= 6mm hex head socket
C= 8mm hex head socket
D= 3/8 universal
E= vise grips to hold G (ground down torx)
F= 1/4 socket to hold G (ground down torx)
G= ground down torx (in open end wrench)
H= 1/4 open end wrench
I= 16mm open end wrench
J= extensions
K= 3/8 craftsman ratchet
L= 3/8 snap-on ratchet
M= pry bar
N= regular screw driver
O= pick
Procedure
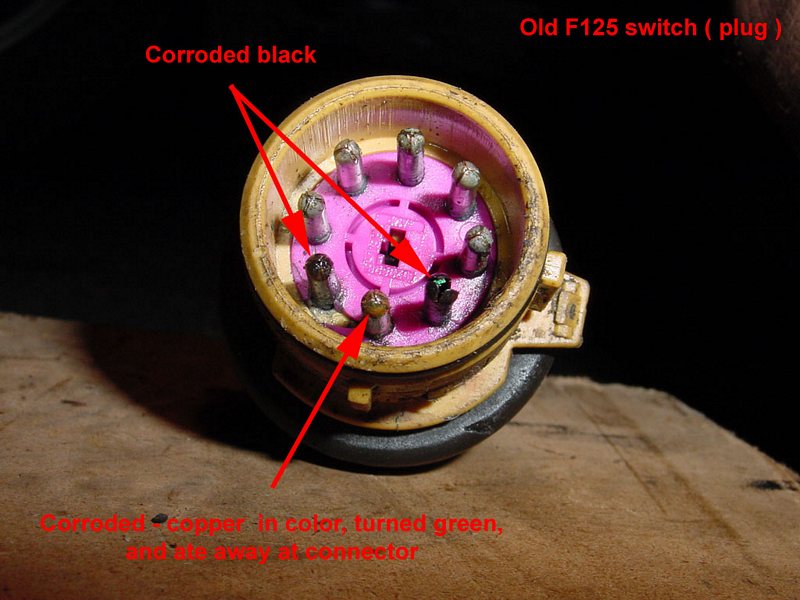
Ok, so after I cleaned all of the oil out of the connector. I noticed a lot of corrosion on the contacts within the plugs.
Old F125 switch, notice the corrosion on the contacts.
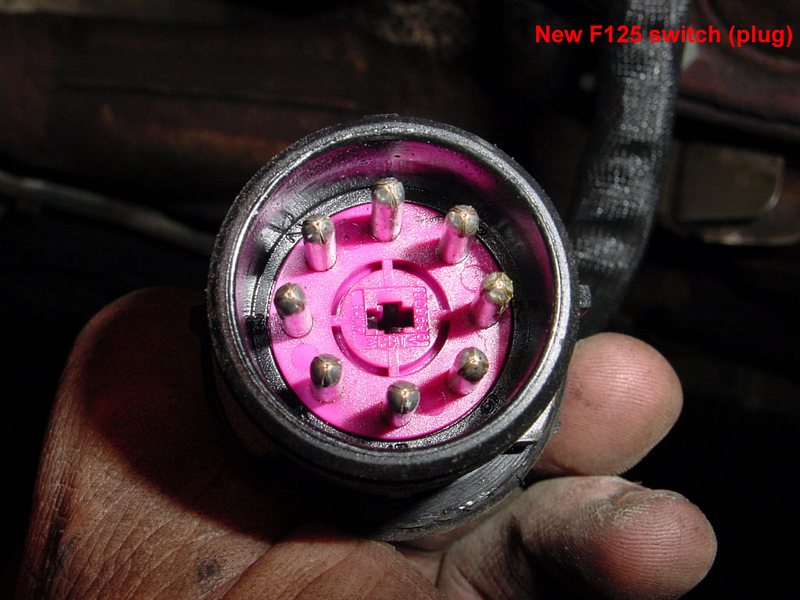
New F125 switch.
I plugged in the new F125 switch and tried it using a screwdriver to turn the switch, while my assistant sat in the drivers seat and told me what I was doing. The old unit did not work after I cleaned it very well, and the new unit worked 100%.
For bolt torque, please refer to your Bentley, or ask someone with a Bentley.
1) I did this on the ground, jacking the car up. The F125 switch is on the driver side of the car, so make sure to jack up that side.
2) Place jack stands at the rear and front locations.
3) Take off front wheel. This will make access to the areas much easier.
4) Turn the wheel to the left which will help with access as well.
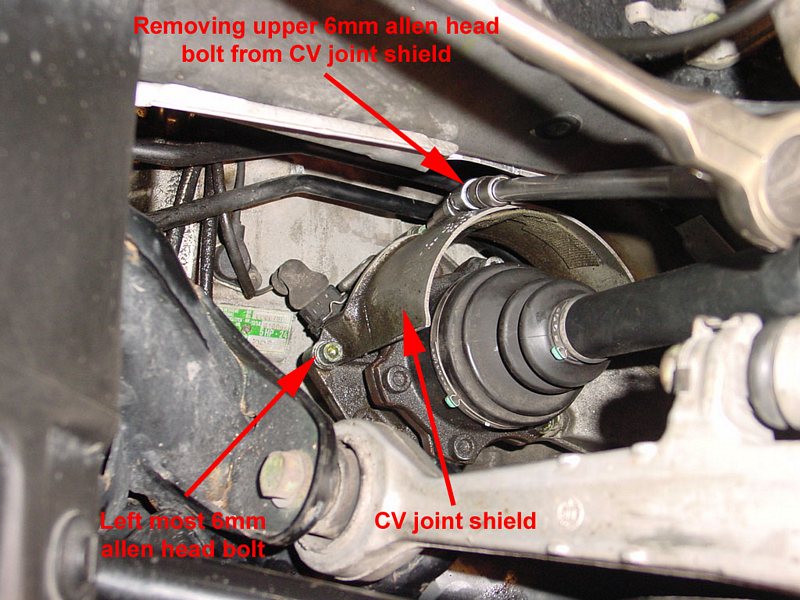
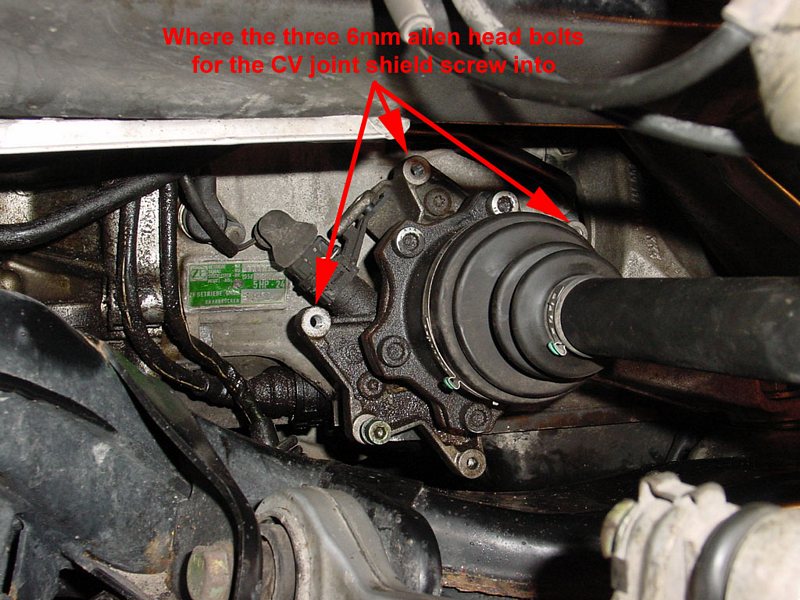
5) Remove the CV joint shield:
There are three 6mm hex head bolts. Using the 6mm hex head socket (tool B) remove them. The left and right ones are very easy, but use a long extension (tool J). The top most one is slightly blocked so I used a universal joint (tool D) at the bolt location which worked perfectly.
Remove shield. Access to the transmission support bracket will now be easier from the wheel well now.
6) Support the drivers side of the transmission with a small jack.
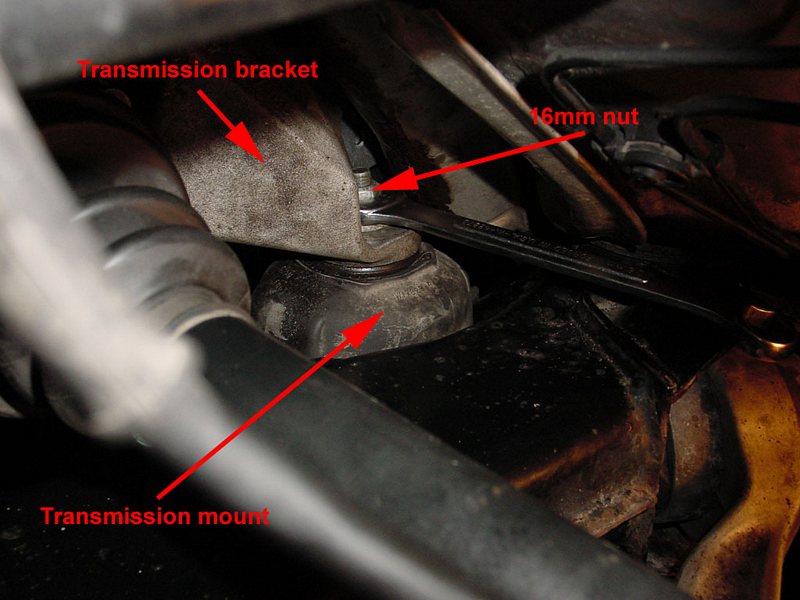
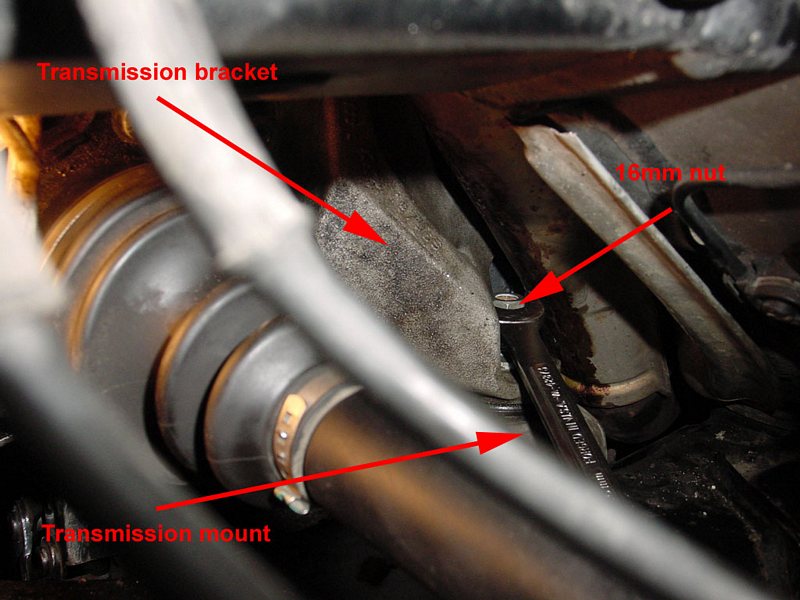
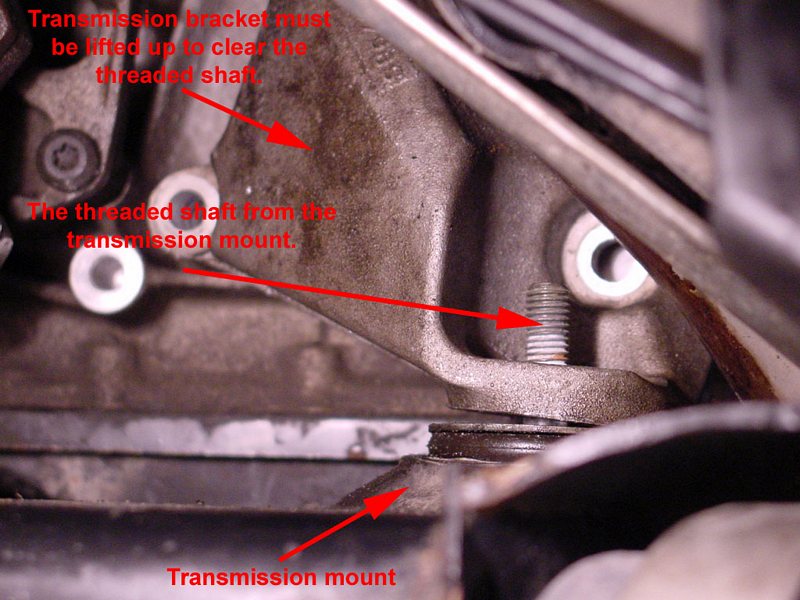
7) Remove the 16mm nut that holds the transmission mount to the transmission bracket:
This is a tight fit. I removed it with a (tool I) 16mm open end wrench, 1/6 of a turn at a time. Turn it as far as possible, then flip the open end over to change its angle, turn is again. Repeat over and over.
Once it is loose you can turn it with your fingers. Remove the washer under the nut you just removed. The transmission mount stays here for now.
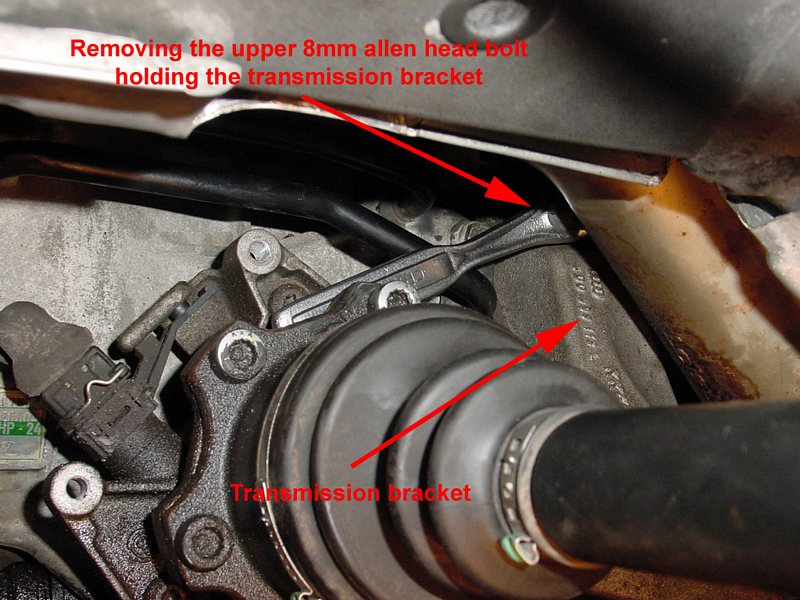
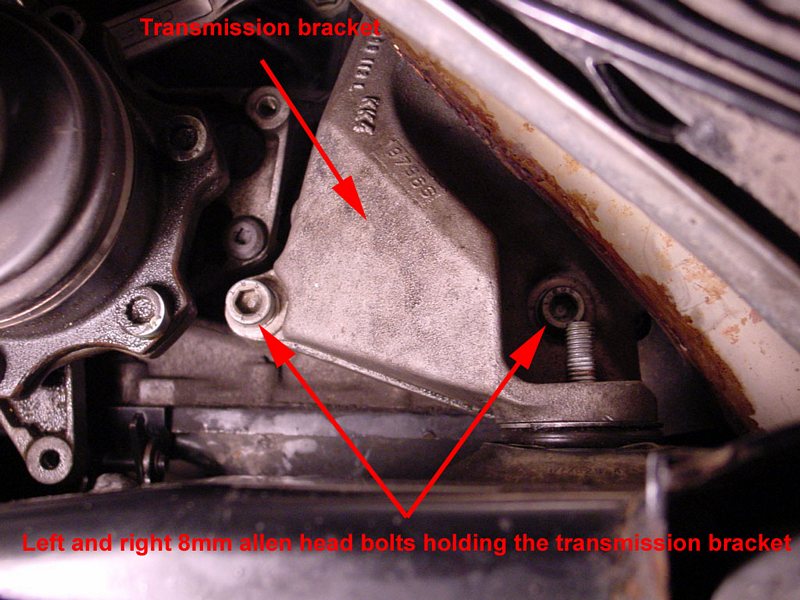
8) Removing the transmission bracket:
There are three 8mm hex head bolts on the bracket but before we get to removing the transmission bracket, I want to let you know the top most bolt is a huge PITA. It is very far up, and it can barely see it. This requires patience, but is completely possible.
Top one:
With just the 8mm hex head socket (tool C) in hand, I reached up and placed it into the bolt. Then I stuck my shorter craftsman 3/8 drive ratchet (tool K) on it. The motion to remove it is pretty easy, just pull it down to loosen it. Once it gets loose you can unscrew it with your fingers.
**This is harder to put back in and tighten than it is to remove. Be very careful when reinstalling it because if you drop the bolt, or the socket, you have to remove the bracket to find it (it always fell onto the top of the F125 behind the transmission bracket). I recommend when putting the bracket back in, do the top most bolt FIRST, so if you drop it, you do not have a lot of work to remove it to find the socket (I dropped the socket twice). Also, when putting it back in, screw in the top most bolt with your fingers as far as possible. Then stick the 8mm hex socket into the bolt, and turn it in further with your fingers. This will save time when reinstalling. BE CAREFUL NOT TO DROP IT. **
Right and left:
These are simple. Remove the left one with the same 8mm hex head socket (tool C)on your long extension (tool J). Note the left one is longer than the others. The right most hex bolt is right above the transmission mounts threaded shaft.
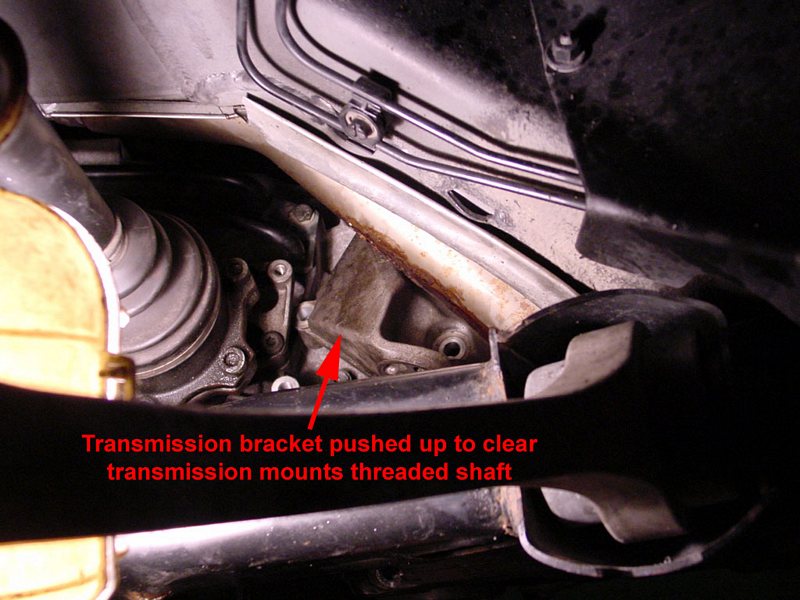
Once all three are removed the bracket will be loose, push it UP and out of the way.
There is a way to place it so it will be out of the way, so you can remove the transmission mount easily during the next step.
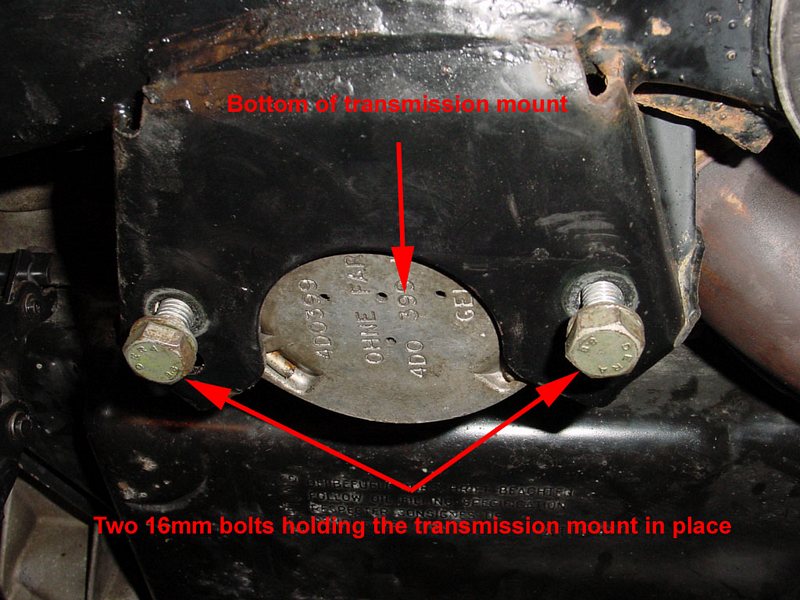
9) Remove transmission mount:
Below the transmission mount there are two 16mm bolts you need to remove.
Once both are removed (using either tool A or tool I), and if the transmission bracket is out of the way, you can angle the transmission mount down and out of the car.
10) Remove the Transmission bracket:
Now that the transmission mount is removed, the transmission bracket will come out through the same place.
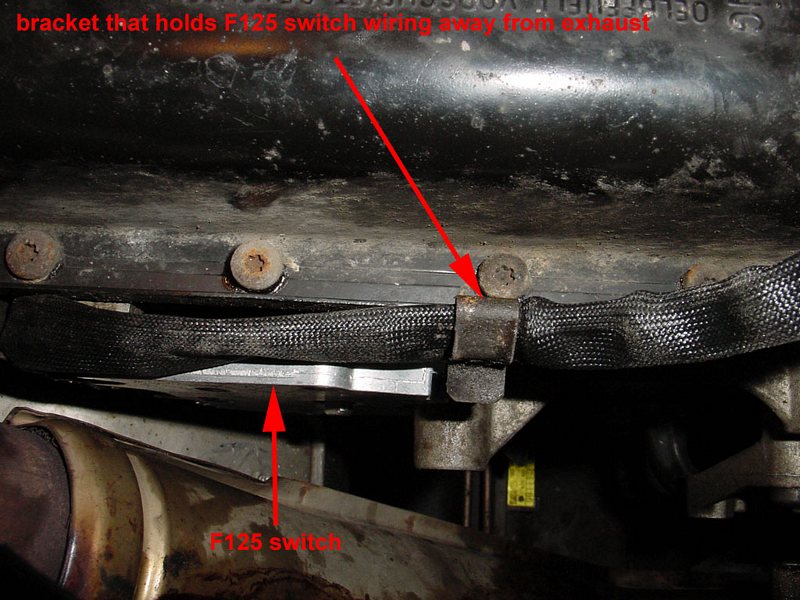
11) Remove the F125 switch:
There are two small torx bolts holding the switch against the transmission. Each bolt has a bracket to keep the wiring for the F125 away from the exhaust, NOTE the way they face before you remove them.
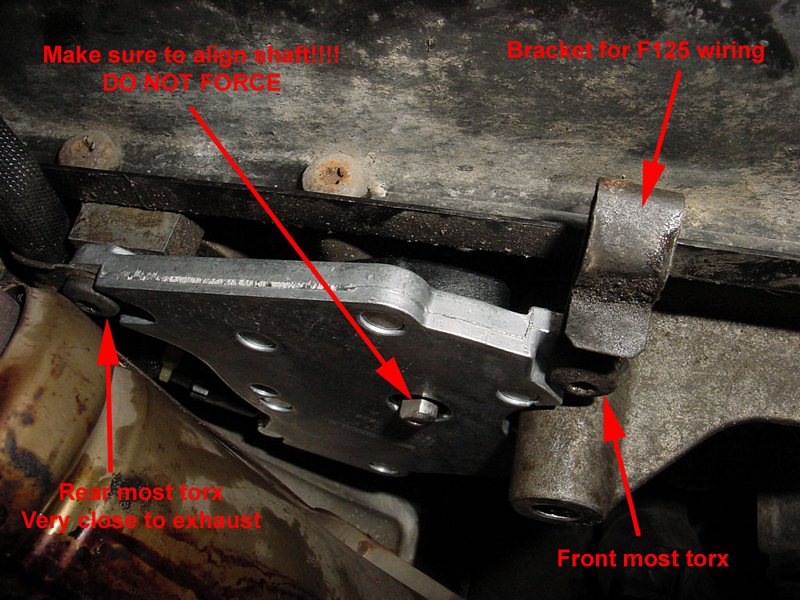
Front most torx:
The front most one is easy, just remove with torx (tool G with tools H, or F or E). I am unsure of this size, only because I ground it down past the size written on the torx to work on the rear torx. Sorry:O
The rear most one:
This is very close to the exhaust.
I chose to grind down the correct size torx instead of removing the exhaust header. I spent 2 minutes on the grinder, much easier than taking the exhaust off.
Removing it from here is easy (tool G with tools H, or F or E), but you might swear a few times. I also used a pry bar to give me a little more room to work on this by moving the exhaust over a little.
** When reinstalling the new F125 switch, be SURE TO NOT DAMAGE THE NEW SWITCH BY FORCING THE NEW ONE ONTO THE TRANSMISSION SHAFT!!! ALIGN IT BEFORE, AND TAKE YOUR TIME.**
12) Unplug the f125 and remove from car. I used a screw driver and pick to get the plugs apart (tools N and O).
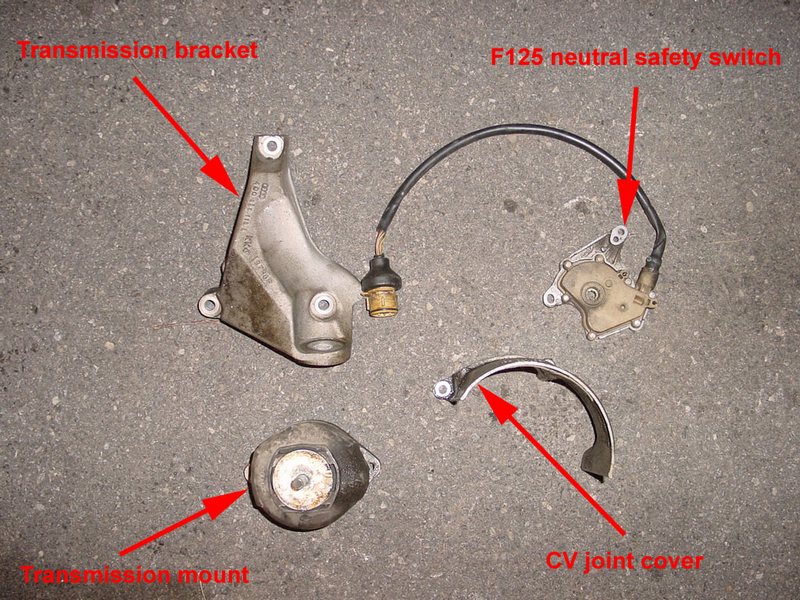
All of the parts I removed to access the F125 switch:
Installation is reverse of removal. Pay attention to step 8 for helpful hints when reinstalling.