Audi A8 Final Drive - Rear
Flange Seal Replacement
By Bob Dunne
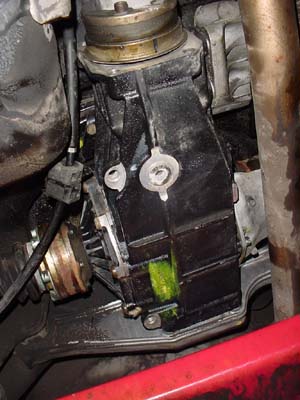
Final Drive - Rear. Note oil and grime splattering on
adjacent support from a leaking output shaft seal.
Problem
The seals on the rear differential tend to leak on most A8's. Not enough to leave you stranded
but enough to leave the differential and surrounding areas wet. This is a fairly straightforward fix. This procedure
illustrates how to remove and replace the "output seals". These are the ones that face the CV axles. There is a third seal in
the differential (it faces the driveshaft) but that is not covered here. That one can develop leaks as well. The procedure for the
driver and passenger side is basically the same with some minor differences noted. If you have access to ETKA, take a look
at illustration 525-20. Part # 12 on the diagram. If you have already done the prop shaft seal replacement, this
will be an easy project for you.
Time
Figure about 3- 3..5 hours to do both sides.
Parts Required
(2) flange seals, assuming that you do both sides. I paid about $12 for both. (Optional) - Audi gear fluid.
Tools Required
12 point star socket to remove axle/CV bolts from rear differential
6mm hex (you'll want this as a 3/8" socket, not an allen wrench)
Baggy, tie wraps
3/8" socket drive, flex head, extensions
Procedure
Get the car positioned (ramps, jackstand, lift) so that you have good access to the center of the car. Note: You will
not have access to all of the axle bolts without either moving the car or rotating the rear wheel(s). I have a pit, so I just moved the car
a few feet which rotated the axle and gave me access to the remaining bolts. You will have to reposition the car if you're using ramps.
On jackstands, I suppose you could rotate the wheels and use the handbrake to lock the axle in place. No big deal, just something to
keep in mind before you get all setup.
Using the 12 point socket, remove the six bolts that hold the axle to the differential flange (see note above, you will have to get the
axle rotated in some way to get all six removed. Mark the axle and flange so that you can get it oriented the same way upon
reassembly.
Now, gently pull the axle down and you will find a convenient holder in the emergency brake cable. You only need access to the
center of the output flange to remove one bolt. You might have to move the CV joint around a little in order to get it to "clear" the lip
on the flange. Just try a few different angles until it drops down and rests on the cable. If there is a lot of grease, put the CV joint
into a big baggy and tie it shut while you do more prep work.
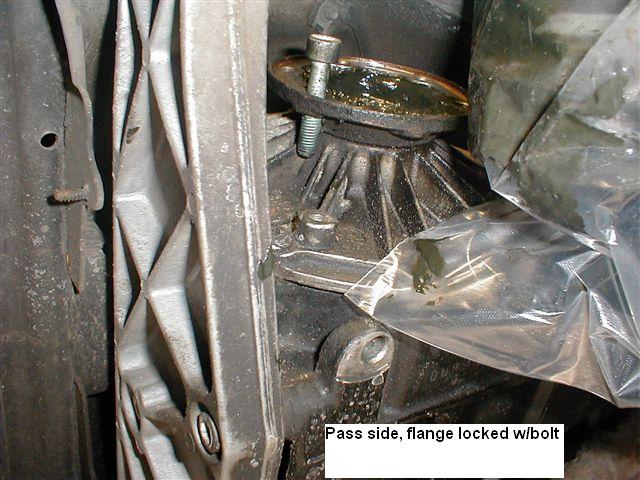
On the pass side, thread one of the bolts back into the flange all the way (remove the bag if you used one). You're going to use this in
order to "lock" the flange in place so you can remove the center flange bolt. Move the flange so that the bolt bottoms out on the differential.
There might be another/better way to do this but the flange bolt is very easy to remove so you're not putting much stress on anything.
Using a 6mm hex/socket, "lock" the flange as described above and remove the bolt directly in the center of the flange. It might not be
obvious with all of the grease inside. This bolt is not torqued tightly so it should come out pretty easily.
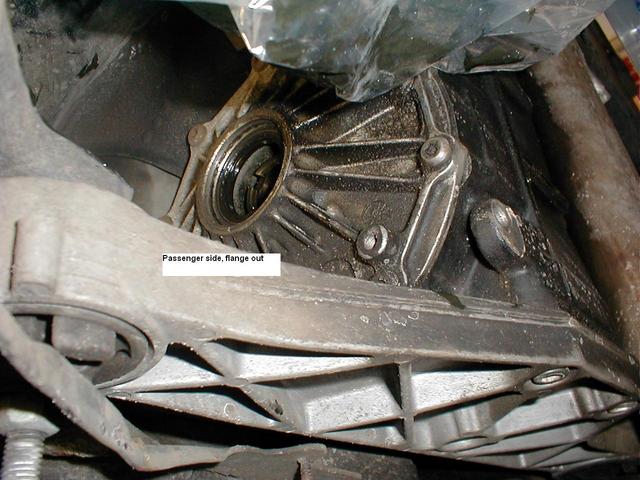
Now, gently pull the flange straight out of the differential. Careful not to bang it and keep it clean. You will notice that virtually no
gear fluid drips out at this point so it is unlikely that you will need any gear fluid to put back in. I checked the level when I was
done and it was full. This is different than the prop shaft seal where quite a bit of fluid drips out when the flange is removed.
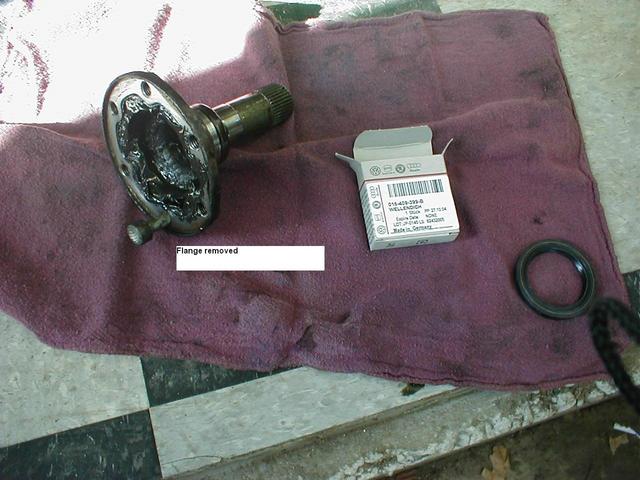
Clean the flange up where it contacts the seal. You can also polish it with very fine (#000) steel wool or similar. I also rubbed a
thin layer of gear oil onto the surfaces that I cleaned up. Once that's done you are ready to remove the seal.
Look inside and you will see the source of your leak. Using a seal puller or something similar, remove the seal. Important:
Make note of the seal "depth" before you remove it so
you can reinstall it in the same manner.
Pay attention to the orientation of the seal when you remove it.
The hollow part of the seal faces in towards the differential.
Reinstall the new seal. Put a light coating of oil, gear oil, similar around the outside edge of the seal so that it slides in smoothly.
NOTE: You need something to seat the seal properly. I happen to have a 46mm socket which is the perfect size. Not everyone is going to
have that laying around. You can use the back of a socket and gently tap around the outside edge to get it seated. Remember
how far in it should go and don't put it in backwards.
Once the seal is in, reinstall the flange. Pay attention to your orientation marks and begin reinstalling the bolts. You'll have the same
issue with access to all six as you did upon removal. Do whatever you did to get them out. I didn't find this in the Bentley (I'll
keep looking) so I don't have torque values for any of the bolts. I'll update once I find them. I've done a millions axle replacements
so I torqued these by feel along with the center flange bolt.
That's it, you're done !! Clean up everything, check the fluid level and test drive for leaks. If you're doing the drivers side as well, read below.
Driver's Side Notes
The drivers side is essentially the same with three exceptions:
The exhaust is in your way. Disconnect the two rubber hangers at the back of the car. This will give you enough flex in the exhaust to
do the job. I would normally support the exhaust with something else but it'll be in your way if you do. I just let the center
hangers support it while I carried on.
There is a metal heat shield which covers axle bolts. Remove the three 6mm hex bolts to get it out of the way. I just left it hanging on the
emergency brake cable.
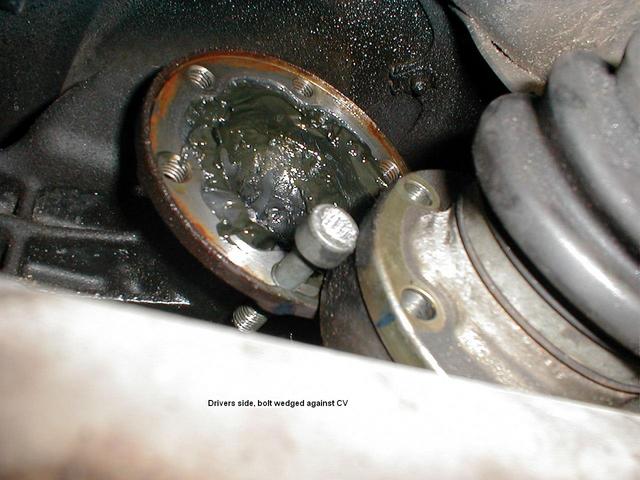
The old "bolt in the flange lock trick" doesn't work on this side quite the same. I was able to push up on the exhaust with my leg, which
in turn pushed up on the hanging axle, which then pressed against the bolt and locked it in place while I removed and installed the
center bolt. Again, there might be an easier way but but I invested about 90 seconds to come up with this method.