Symptoms of a Broken Switch
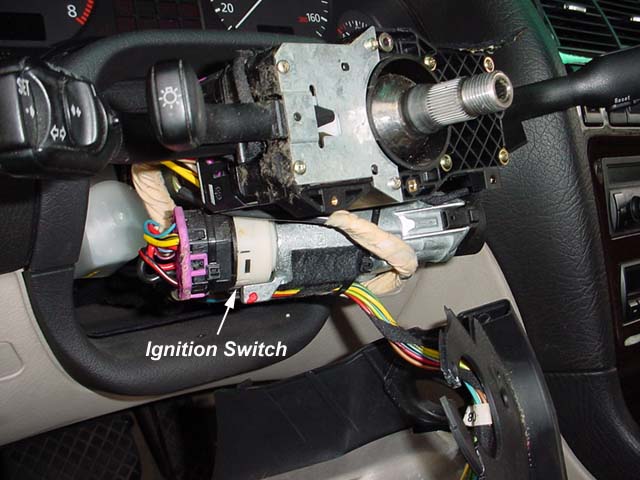
The A8 (and many other Audi models) ignition switch can break and prevent the switch from spring returning to the "ON" position from the "START" position. This is a common failure. The switch is the electrical component mounted at the end of the tumbler. The switch is about $35.00 from the dealer and very easy to replace. Part number is 4A0-905-849-B.
After starting the car, when the switch does not fully return to the "ON" position, the load reduction relay will not energize. The load reduction relay is a relay that energizes many loads such as the headlights, electric fan, turn signals, etc. When these loads fail to energize, you can determine if it is the switch by turning it back about 1/4" to the "ON" position. If the headlights come on, you know it is the switch.
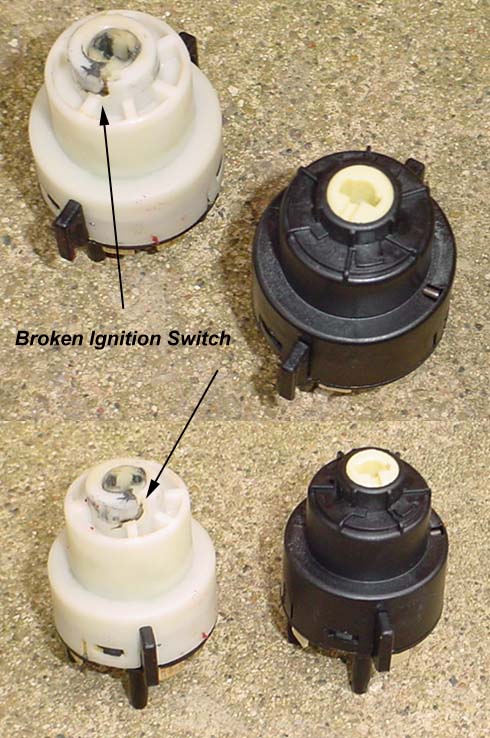
The switch will also not have the heavy spring return it did previously. The switch plastic breaks as shown below.
Broken and new switch. The plastic breaks on the switch.
Replacement of Switch Note: This procedure is in the Bently under "94, Lights, Switches - Exterior". It is shown on audipages under "96, Lights, Switches - Interior, Anti-Theft".
Replacement of the switch is an easy task. Tools required are:
15/16" socket (or metric equivalent to remove steering wheel)
Torx screwdrivers
Very small standard screwdriver
Small phillips head screwdriver
10 mm open ended wrench
The first step is straighten the steering wheel with the car running. Get it as straight as possible and turn off the car. Adjust the steering wheel all the way out and as far down as it will go.
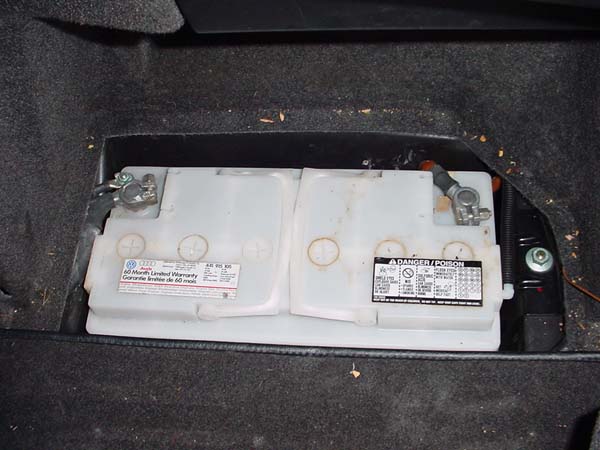
Ensure you have the radio security code prior to disconnecting the battery. Disconnect the battery ground strap. The battery is found in the trunk on the passenger side. This is IMPORTANT so that the airbag will not go off for any reason.
Disconnect the battery negative ground strap.
It is the right hand connection shown in this picture.
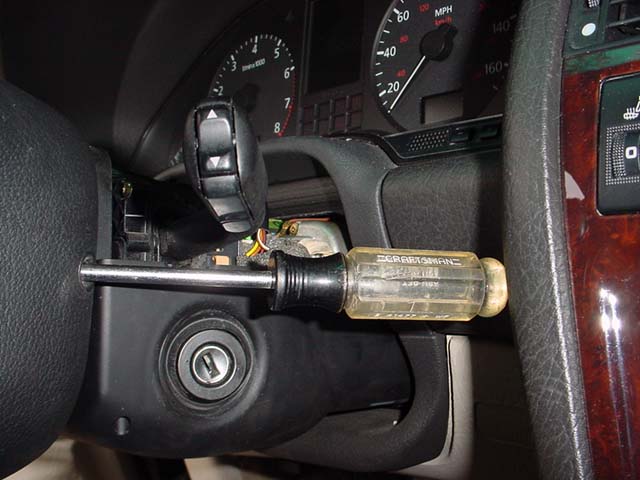
Using a Torx 30 screwdriver, remove screws for airbag by inserting them in the back of the steering wheel. It should find the torx screw head easily. If it is too tight to turn, turn the screwdriver with a pair of pliers to break the screws loose. The screws won't fall out, they will stay in place once unscrewed, see pictures. Tightening torque for the screws is 7 Nm (62 in-lb).
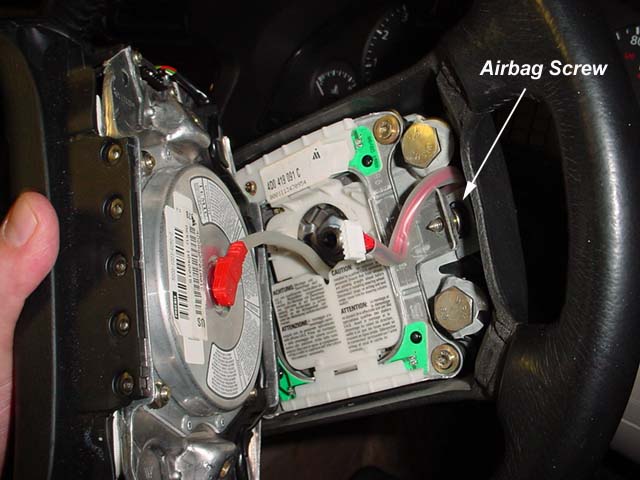
See airbag screw. It will stay in place once unscrewed. There are two total. After the airbag is unscrewed, disconnect airbag connector (red piece) and place airbag face up in secure location. If a multi-function steering wheel, remove additional airbag electrical connector. Tightening torque for the screws is 7 Nm (62 in-lb).
Refer to this image for screw removal.
Remove screws (8) (quantity 2) and carefully pull out upper steering column trim (1).
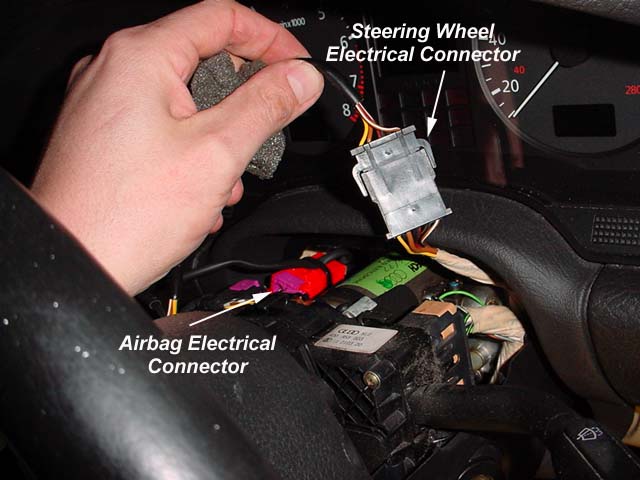
After removing the upper steering column trim, disconnect steering wheel electrical connector and airbag electrical connector.
Using a 15/16" socket (or metric equivalent, it's a metric nut) remove the steering wheel nut, remove the steering wheel.
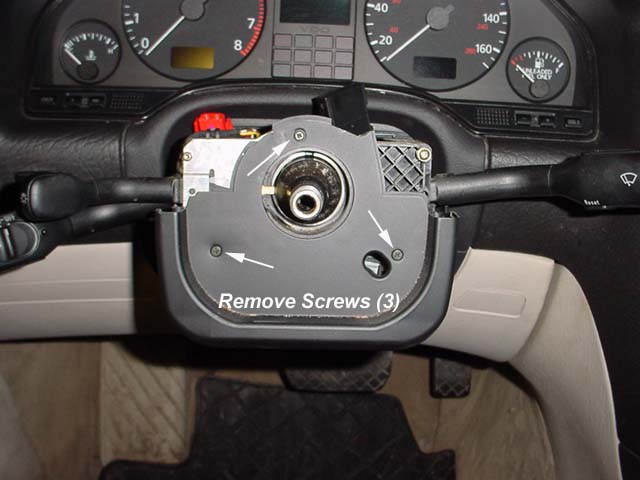
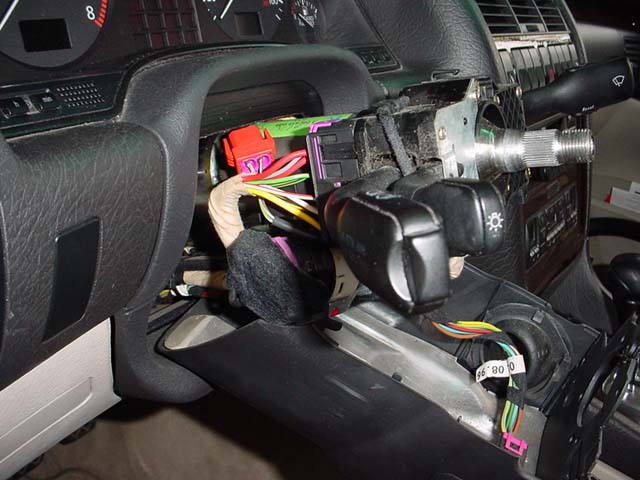
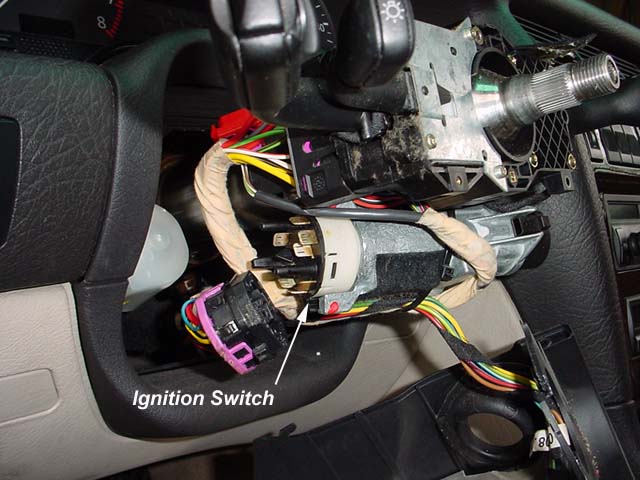
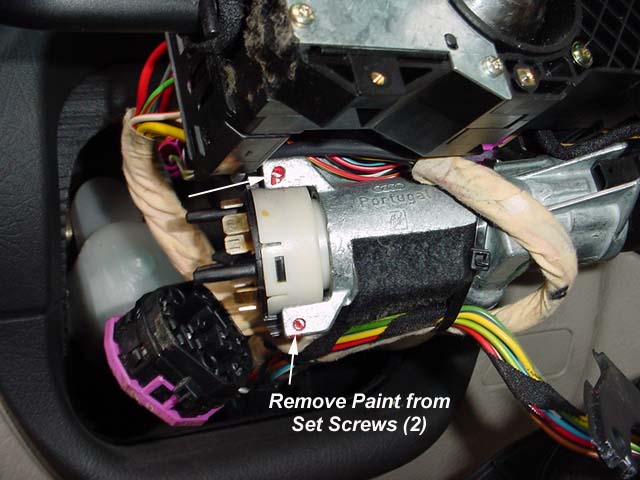
Remove the screws (5) and (6) and torx screw (9), see picture above. Drop lower cover out of way and the ignition switch will be exposed. Remove the anti-vibration carpet around the switch, and then unplug the electrical wiring from the switch. Once the switch is visible, you will see two little screws with red paint on them. They are the set screws that hold the switch onto the tumbler. Scratch the paint off and loosen/remove the screws. The switch will pop right out. Ensure the new switch is in the same position as the old switch and install it. Tighten the screws, paint them if you'd like and reassemble. That's it!
To reset the radio with the security code, see your radio manual or visit Ti Kan's Audi radio page. To reset the climate control from degrees C to degrees F, press the recirc button and the driver's side "+" temperature control. This will toggle from degrees C to F. To reset the auto down/up function on the windows, cycle them all the way down and up a few times, the function will be restored.