Overview
The following procedure is to be used on the A8 D2 platform, although it may be the same for the D3.
Please consult the Bently manual before using this procedure.
Determining if you need this procedure.
- It stops producing consistent flow.
- It starts to produce excessive noise such as squealing.
- It cuts out completely when taking corners.
- The VAG-COM produces this when testing Address 08 - Auto HVAC:
01273 - Fresh Air Blower (V2)
17-00 - Control Difference
|
Time & Costs
- Approximate parts cost: $150.00 - $200.00, depending where you buy.
Check the AudiPages parts suppliers list.
- Approximate time needed: 1.5 - 2.5 hours depending on experience.
- Approximate money saved doing it yourself: $400 - $500 US.
Tools Required
- 3/8" drive ratchet.
- Metric 3/8" drive short socket 10mm.
- 3/8" drive universal-joint style drive adapter. (Helpfull)
- 3/8" drive 9" extension.
- Number 2 Phillips screwdriver. A magnetic one is best.
- Number 1 Phillips screwdriver. A regular one, with a skinny shaft.
- 90° Number 2 Phillips screwdriver - Must be short depth 90°.
- Long Flat-tip screwdriver.
- Medium-size needle nose pliers.
- Long, thin, small-sized box-end wrench.
Optional Tools
I bought this at the Craftsman store, and it really reduced the time removing 4 of the screws.
It can also be used with the shortened torx bix for the transmission filter change.
Sears item #00904116000 Mfr. model #4116
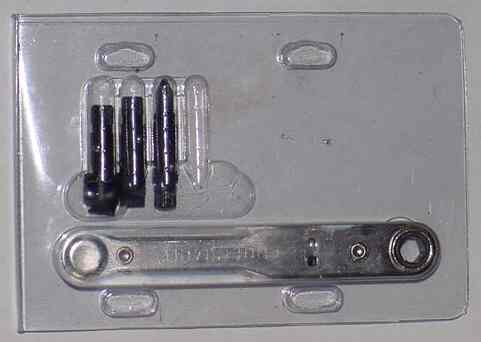
Parts Required
Fresh Air Blower, Part # 4D0 959 101
Procedure:
- Use the #2 Philips:
Remove the 3 screws holding the Fresh Air Intake grill.

- Use the #2 Philips:
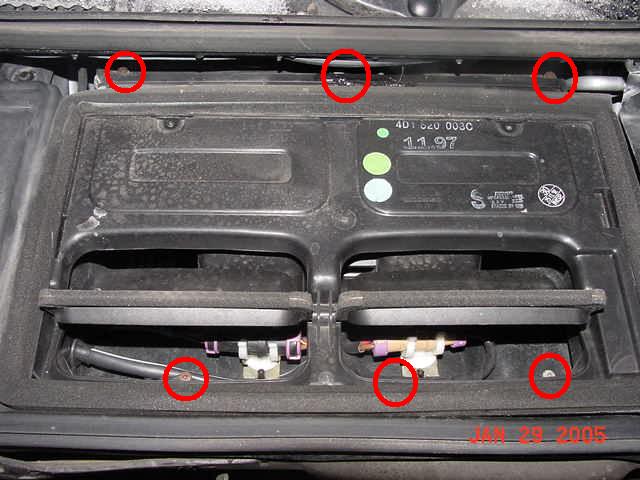
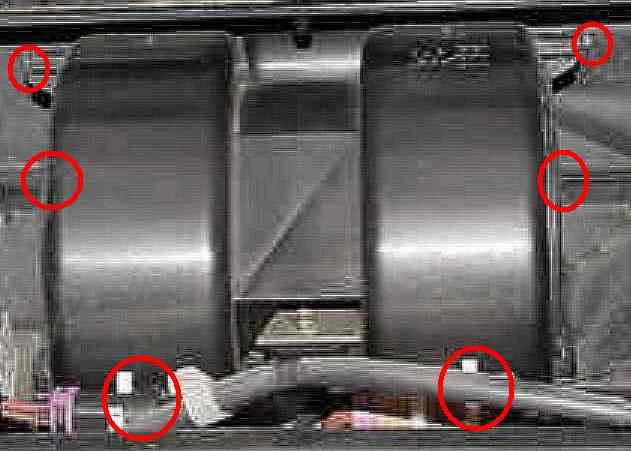
Remove the bottom 3 screws of the plenum. (Shown by the bottom 3 red circles)
- Use the #1 Philips:
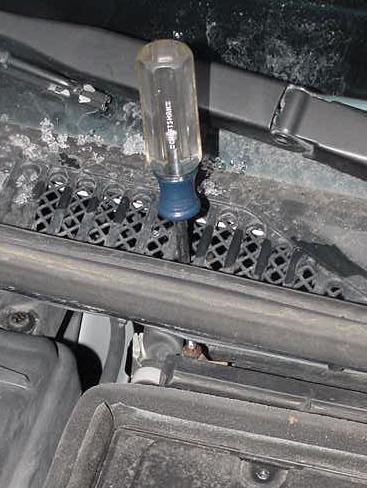
Remove the top corner screws of the plenum, by gently pushing through the wiper grill.
- Use the Short Depth 90° #2 Philips and Needle-Nose pliers:
Loosen the top middle plenum screw with the short-depth 90° screw driver, and then use the needle-nose pliers to loosen the remainder.
- Use the Long Flat-tip screwdriver:
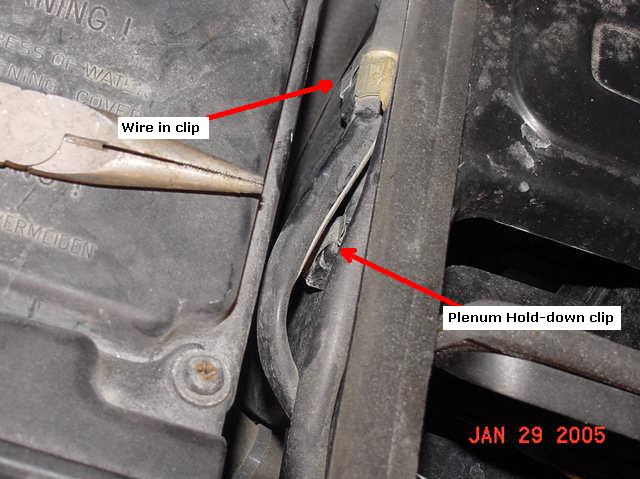
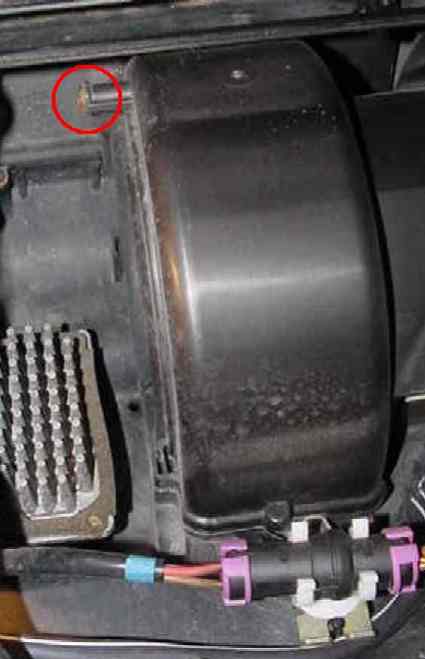
Disengage all 4 clips on the side of the plenum, and gently pry the wires out from their retainer clips. There are 3 wire clips; 2 on the passenger side and one on the driver's side.
- Use the #2 Philips:
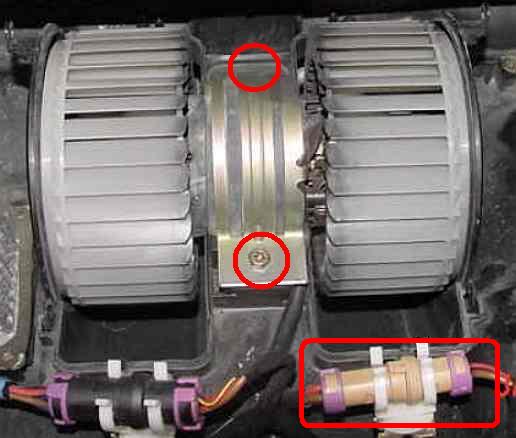
Gently lift the plenum and remove the screw in the front (hidden until now) that holds the wiring clamp. You can now lay the plenum off to the side, exposing the fan cowl. Take note of the 6 screws neede to remove it.
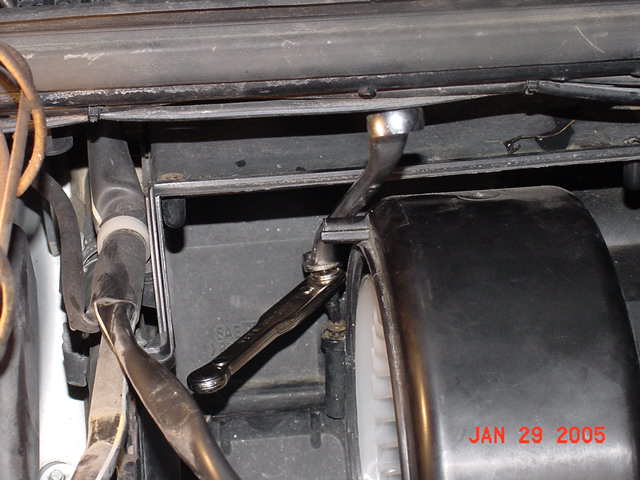
- Use the Short Depth 90° #2 Philips (optionally, the ratchet 90°) small-sized box-end wrench:
Remove the rear screws. Notice how I used the box-end wrench to apply the downward pressure needed to keep the 90° ratchet screwdriver on the screw. This speeded things up considerably.
- Use the same procedure above:
Remove the top screws (the screws that face outboard) on either side of the cowl, and then remove the cowl.
- Use the 10mm socket, the 3/8" universal, 9" extension and 3/8" ratchet:
Remove the rear and then the front 10mm bolts off the fan retainer bracket. Then, using the flat-tipped screwdriver or your fingernail, disconnect the eletrical connector.
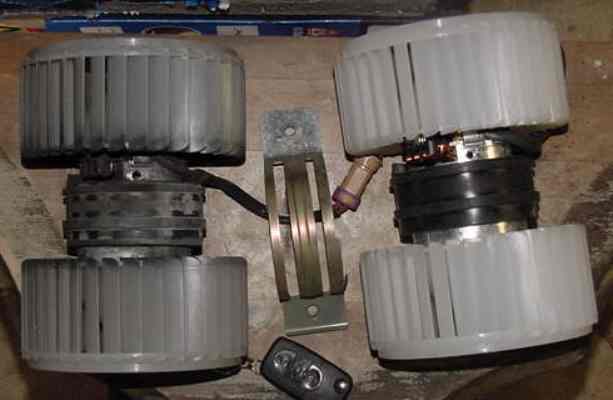
- Comparison of Old & New:
And take a look at the amount of carbon:
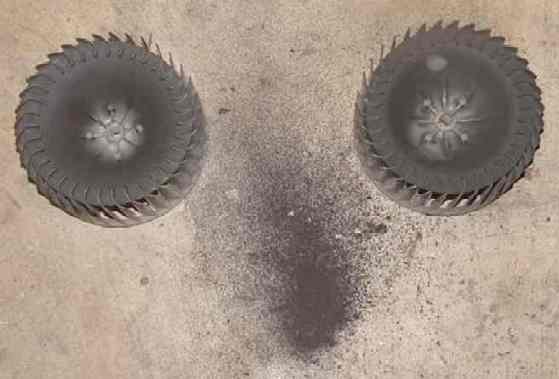
The wear on the fan commutator:
Picture courtesy of matrixabc of the AudiWorld A8 Forum.

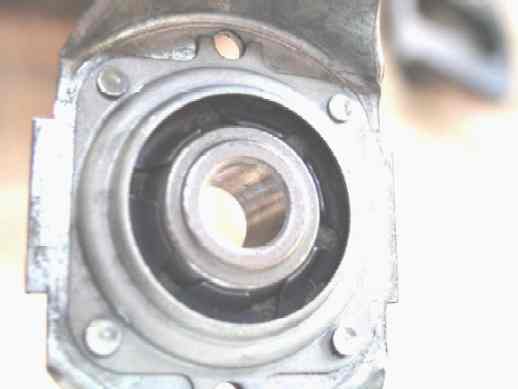
This fan bearing pic also came from matrixabc of the AudiWorld A8 Forum.
The bearing is solid and not ball bearings:
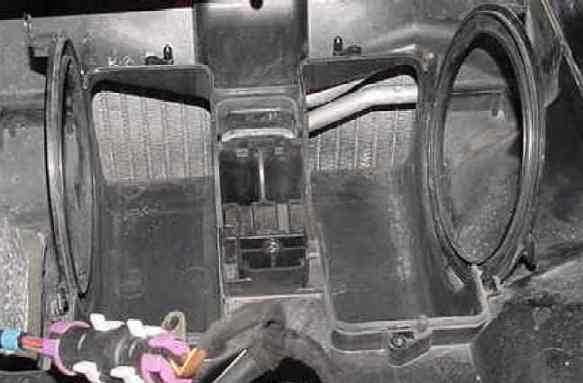
- Take this opportunity to inspect the heat exchanger fins:
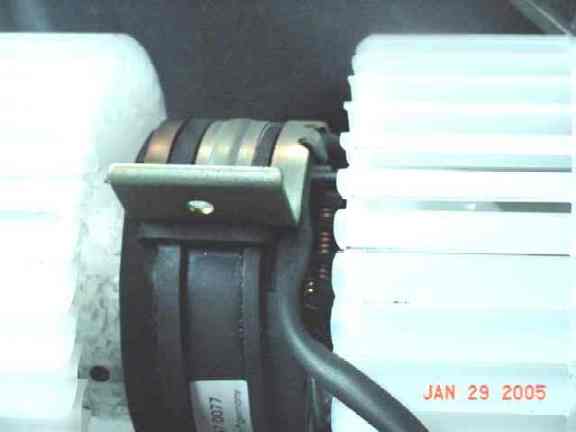
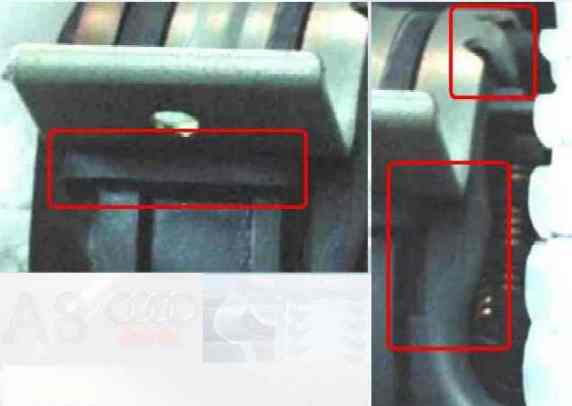
- Insallation of bracket on new fan:
Take extra care to make sure all three items line below line up when installing the bracket on the new fan. The left most is a detail of a tab on the rubber. The other 2 are the routing of the wire.
Note: The wire comes off the top passenger side of the fan!
- Mount the fan by reversing Step 9:

- TEST!!!
Make sure you turn the ignition key to the "ON" postition, and manually turn the fan speed to high. If the fan does not turn, refer to the Bently manual for additional troubleshooting procedure, including test for voltage, etc.
- Test successful - Install the cowl - Reverse Steps 7 & 8
- TEST AGAIN!!!
Make sure you turn the ignition key to the "ON" postition, and manually turn the fan speed to high. Listen for any rubbing on the cowl, etc.
- Test successful - Install remaining components - Reverse Steps 6 through 1:
Start at Step 6 and work your way back until completely reinstalled.