Audi A8 Wheel Repair: Curb Rash
By John Griffin & Paul Waterloo
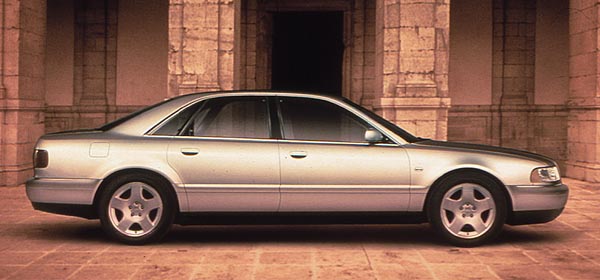
Like many contemporary high end performance sedans, the Audi A8 features a stunning set of available 17” alloy wheels
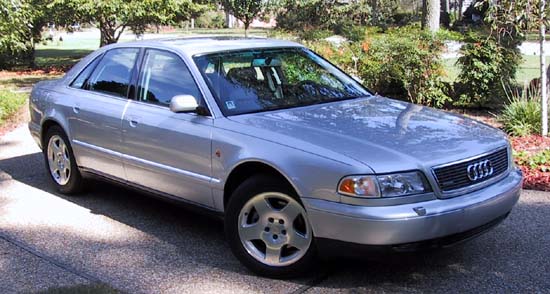
Audi's Flagship the all Aluminum A8
For maximum performance and stability, the A8 wheels are not only large in diameter; they are quite wide; 8” as measured across the rim.
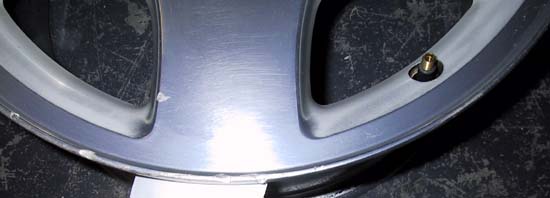
(Picture 2)
17x8” Wide Forged Alloy A8 Rim
While this design feature provides ideal support for modern low profile performance tires, it also leaves the delicate outer wheel rim dangerously exposed to curb damage.
Typical and Unsightly Curb Damage
Curb abrasion obviously mars the visual appeal – and market value – of this particularly beautiful automobile. So, what's to be done?
Wheel replacement is always one option. Dealer cost is over $500 each, with them not be a stocked item.
Wheel repair by specialty firms is another option, and one that should be carefully considered where rim damage is severe or any structural or collision damage is involved. Wheel Collision Center, of Bath, PA has a good reputation with Audi wheels. WCC charges $350 - $450 per wheel to repair curb abrasion, which includes reanodizing.
Finally, there's the DIY option. The good news is that most minor curb damage can be repaired easily and inexpensively. It simply requires a little time and effort.
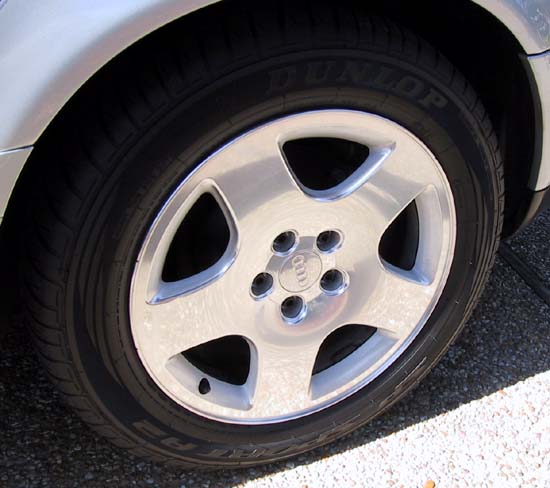
Like other forged Porsche and Audi counterparts, the A8 wheels are anodized, not painted. Anodizing is a super hard surface treatment appropriate to high quality drawn or forged aluminum structures. Approached carefully, anodizing can be selectively removed from the damaged wheel edge areas. This allows smoothing and polishing of the underlying aluminum alloy. The result is aesthetically pleasing and blends very nicely with the bright, highly polished A8 wheel.
Repaired A8 Wheel with Polished Outer Rim Edge
While the polished rim lip is somewhat more susceptible to corrosion than the original anodized surface, practical experience shows that this is rarely a problem. Just a lick of auto wax once or twice a year will keep your wheels bright and shining. The real value of an anodized surface is in those areas you can't see, or can't easily access for cleaning – the inside rim surface, etc. This is where road salts and brake dust can erode painted and polished alloy wheel surfaces over a period of time.
(picture 5)
Tools and Materials You Will Need
Materials List
Sandpaper; One Sheet Per Wheel
80 Grit Open Coat Paper
120 Grit Open Coat Paper
180 Grit Wet or Dry Paper
320 Grit Wet or Dry Paper
600 Grit Wet or Dry Paper
3M Rubber Sanding Block
Buffing Wheel; 1/4” Drill Mounted
Red non ferrous compound; One stick
White Jewelers Compound; One stick
Other Tools and Materials
Hand Drill
2 ½” Masking Tape
Bucket of Water
Auto Wax
All of these materials can be had for less than $30.
(picture 6)
Simple Tools and Materials
First, removing the tires is highly recommended. This should be done to protect your anodized wheel surface against any slips or mars. If the tire is not removed, it will be very difficult to work.
After demounting the tires, the first task is to smooth down the damaged wheel lip areas. This can be accomplished with a wide, smooth bastard file (buy a sharp, new one, together with a file card to keep it clean). As files tend to load up when working with aluminum, another initial smoothing approach is coarse sand paper, mounted in a sanding block or sanding wheel. Use open coat 80 grit dry paper to start. It is suggested you obtain it, a rubber 3M sanding block, and the other materials noted herein from a dedicated auto body supply store. They will have the best quality materials.
Clean the wheels thoroughly. While not absolutely necessary, this only takes a few minutes, and will make the job much easier. Laundry detergent mixed with a little warm water will clean the brake dust and crud off in a hurry (stay away from commercial, acid based wheel cleaners). Just use a stiff scrub brush where it's caked up on the inside of the wheel. Let it set for a few minutes, then hose off with plenty of water and dry.
Next, place the wheels shiny side up on a soft surface (the lawn, a piece of plywood, but not the rough driveway). Run a couple of layers of masking tape around the face of the wheel, right adjacent to the rim lip. This is an optional step, but doing so will protect the wheel face against any slips or bobbles while you work.
(picture 7)
Taped and Ready For Repair
Using 80 grit paper (or the bastard file), carefully begin smoothing the abraded rim lip areas. A big caution: keep the file or sanding block angled away from the wheel face! This will prevent any unintended damage to the wheel face anodizing.
(picture 7)
Proper Tool Angle
Because of the thin (about 3/8”) outer rim lip cross section, this initial smoothing step will go pretty quickly. Remove only just enough material to flatten the abraded areas, and then smooth the transition to non damaged areas. Remove surface anodizing around the entire wheel circumference, but only on the very outer rim lip surface. No need to remove any additional material where no damage is present. Any very slight lateral runout is inconsequential and unnoticeable. Just make sure that the treated wheel lip is smooth and flat when done with this step. Don't worry about slight imperfections on the inside edge of the smoothed outer lip; these can't be tackled at this stage with risk of marring the wheel face. They will be addressed a subsequent step.
(picture 8)
Removing the Curb Abrasions
The remaining task is to prepare the treated rim lip for final buffing and polishing. Use the 120 grit paper as done with the 80 grit paper, just a few strokes will remove the 80 grit scratches. Then begin using the wet paper mounted in your sanding block starting with 180 grit paper. Use plenty of water and remember to keep the sanding block at a safe angle above the wheel face. As you progress to the 320 and 600 grit paper, just a few strokes of each grade are all that are needed.
At this stage, you will have a smooth, kinda' shiny rim lip devoid of any abrasion damage.
(picture 9)
Final Preparation for Buffing
Now, taking a small piece of the 180 grit paper, double it over into a 2” square and carefully sand any remaining abrasion marks on the inside and outside outer rim edge. Be very careful to keep your sanding confined to the very outer rim lip, so as not to scratch sound anodized surfaces. Having blended any such areas, go around the entire refinished wheel lip and “break” any sharp edge left by the earlier steps. Finally, progress to the 320 and 600 grit paper in the same fashion. This takes longer to describe than to actually do, yet will result in a professional looking job.
(picture 10)
Buffing to Perfection
Now, for the final step to a truly professional finish. Mount the buffing wheel, applying the red compound, buff the sanded wheel lip to a smooth shine. Given the 600 grit preparation step, this only takes a few minutes. Be careful with the red compound; used carelessly, it can damage the anodized wheel face. Finally, spike (clean) the buffing wheel (or mount a fresh one – they're cheap), and finish with white polishing compound.
This is a good time to remove the protecting masking tape layer, clean the face of the wheel, and use the white jewelers rouge to quickly buff and polish the anodized wheel face. This will make your wheels look new and effectively blend the bright repaired wheel lip. Finish up by waxing the entire wheel, including the inner rim surface you cleaned all that brake dust off earlier. This will keep it surprisingly clean, as brake dust will flush off the waxed surface quite easily.