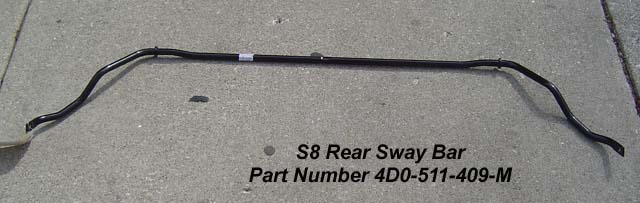
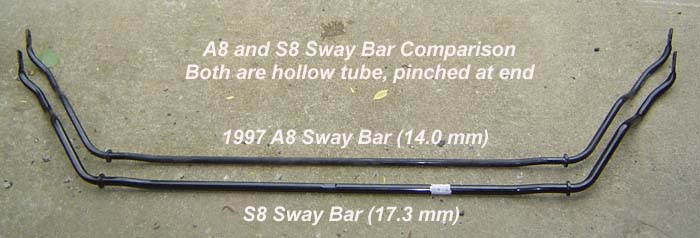
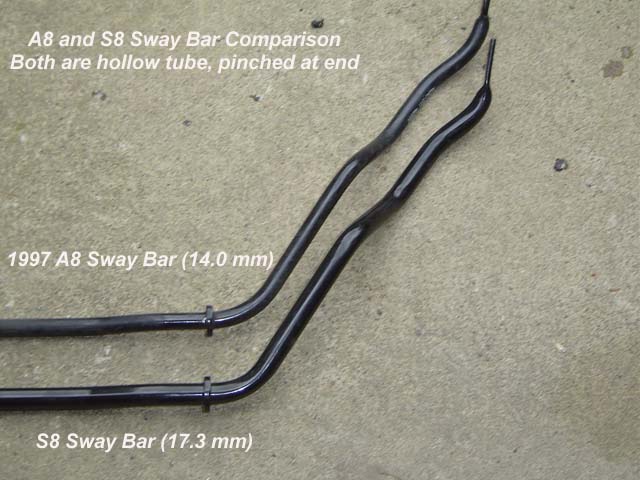
My 1997 A8 came with a 14.0 mm diameter rear sway bar, the S8 came from the factory with a 17.3 mm diameter sway bar. Being that I track my car, I wanted to see what kind of improvement that I would gain from installing the rear sway bar. After asking other Audiworld members, I determined that this would help the car turn better.
Please check the ETKA or the actual size of your sway bar to ensure you don't already have a 17.3 mm diameter sway bar. I believe some of the A8's came with the larger bar.
After doing the install and visiting certain highway on/off ramps that I frequent, I can confirm that this sway bar does make an improvement! It should be noted that I already have upgraded my suspension to H&R coilovers. If your A8 has the stock suspension, I don't know how much difference you would notice.
The car stays planted much better in turns and will corner harder before squealing the tires.
Parts Required and Cost
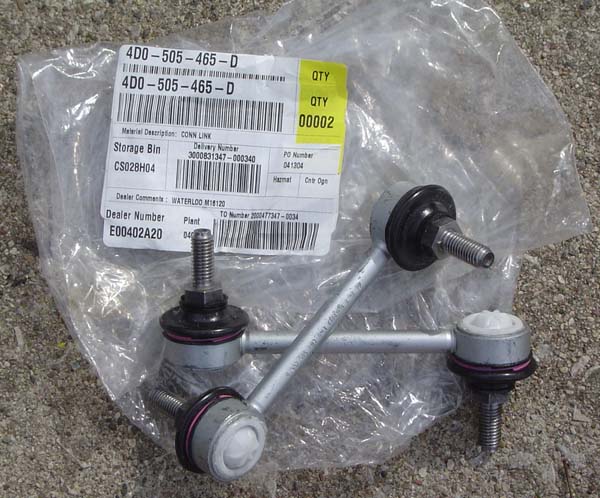
This upgrade is not terribly expensive, it is suggested that you replace the sway bar links at the same time you replace the sway bar. The two links cost almost as much as the sway bar.
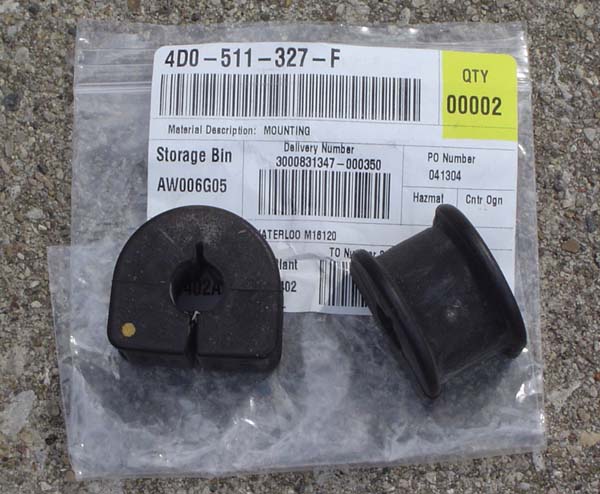
The existing rubber mounts were in good shape, and oddly enough, they were the same part number as the new rubber mounts. Made it very difficult to get the metal clamps around them with the larger sway bar!
Installation Instructions
Installing the new sway bar is not terribly hard, but does take some time. If you don't have access to a lift, it makes it more difficult. Without a lift and without dropping the exhaust, it took me about 3-4 hours. If you had access to a lift and these instructions, it could be easily completed within 2 hours.
NOTE:Align vehicle after replacement of the sway bar. The rear alignment will be changed due to the adjustment bolts on the rear suspension being removed for installation of the bar.
Comparison of S8 sway bar to 97 A8 sway bar.
Jack the car up so both rear wheels are off the ground or put the car up on a lift. Remove both rear wheels.
Remove the rear section of the exhaust as outlined in the transmission seal replacement procedure here. When I did it, I just lowered the rear muffler/back end of the exhaust by undoing the two muffler clamps at the very rear of the car. Any time that you save by not removing the exhaust will be used up trying to get the old and new bar out and in. But if you don't have a lift, removing the exhaust is very difficult.
If you elect not to remove the exhaust, drop the exhaust slightly by removing the two rear muffler rubber hangers. This will drop the exhaust in the rear about 4" which allows you to complete the job. However, it is very tricky to get the bar in and out without the exhaust removed.
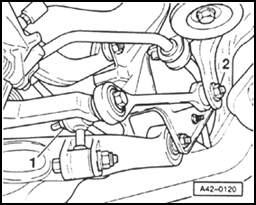
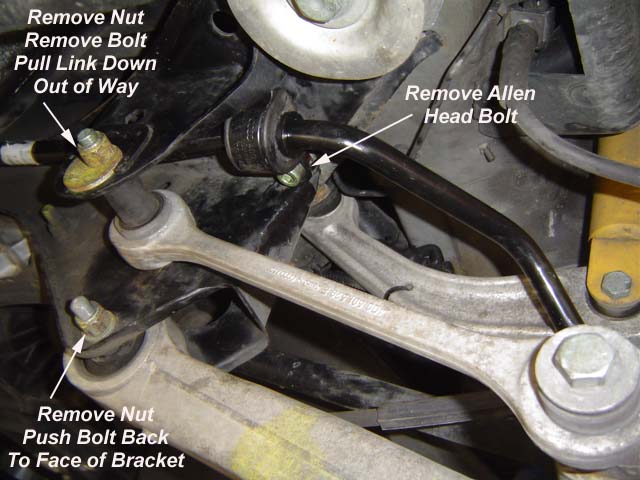
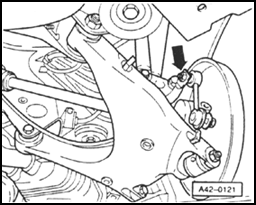
See picture below, remove nut 2. This must be completed by unscrewing the nut, the bolt CANNOT being rotated more than 90 degrees, it is the suspension adjustment bolt. Remove the eccentric washer and eccentric bolt.
You will also have to unbolt the nut below it and push the bolt forward to the face of the bracket. Then swivel the link down and out of the way, you might have to loosen the bolt at the other end of the link (1) to get it to swivel.
Complete both sides.
Remove nut 2, loosen nut 1 to rotate link, see picture below for more details.
Passenger side shown.
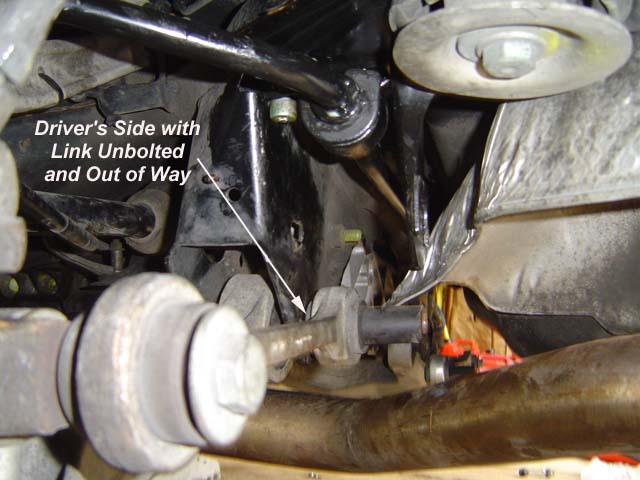
Driver's side shown.
Remove the connecting links from the sway bar. Remove the link from the rear suspension. You do not have to remove the brake dust shield (if installed) to remove the link. It's tight, but you can get it easily with two 16mm wrenches.
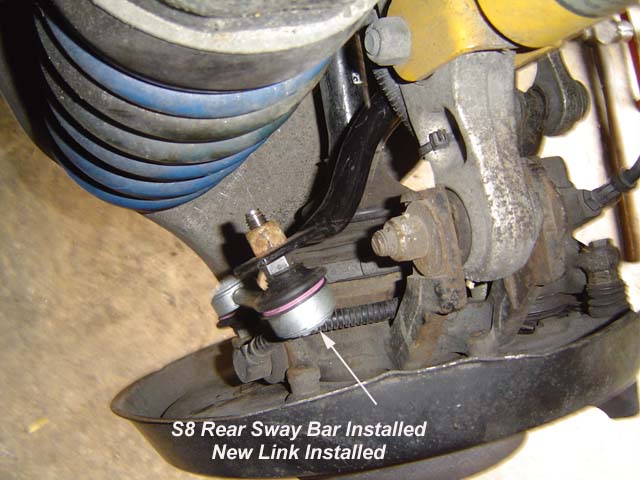
Remove connecting links from sway bar and rear suspension.
New connecting link installed.
Remove the allen head bolt holding the sway bar mounting brackets in place. The back end of the bracket is notched into the subframe, remove it from the subframe. The bar should come out now.
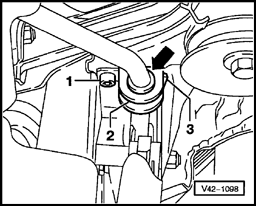
Remove allen head bolt (1), remove clip (2) from recess (3) in subframe.
Installation
Installing the new bar can be difficult. If you didn't remove the exhaust, work it into place. I had to remove one caliper and the emergency brake cable from that caliper to get it threaded through the correct way. I started at the passenger side and passed it through to the driver side.
When starting the roll bar clips, it will be very difficult to get them around the rubber bushings. Use a generous amount of hand cleaner or soap solutions on the parts and it should go together with relative ease. The rubber bushing must come in contact with the collar located at each end of the sway bar.
Do not tighten the allen head bolt until the car is resting on the ground. Tightening torque - 22 lb-ft (30 Nm).
When reconnecting the adjustable link, Do not tighten nuts 1 and 2 until the car is resting on the ground. Tightening torque for nuts 1 & 2 - 52 lb-ft (70 Nm) plus an additional 90 degrees.
Do not tighten nuts 1 and 2 until the car is resting on the ground.
Alignment
You will most likely notice that your steering wheel is no longer straight. Get your car aligned at an Audi dealer or somebody who knows how to align an A8. That alignment will cheaper than a new set of tires, and you'll still need it!
Go find your favorite on/off ramp and try out your new sway bar!