Technical & Maintenance | Upgrades & Style | Used A8 Buyer's Checklist |
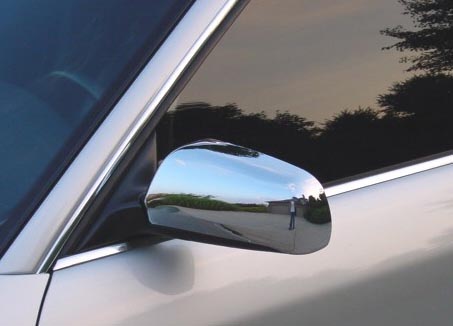
Audi Chrome Mirror Caps
For the A4, A6, S6 and A8
Your car will look hot! Make it look like a S4, S6 or S8!
This kit if for Audi cars that came with the asymmetrical mirrors
Fits all models and years listed below
Application Chart for Asymmetrical Mirrors
Installation Instructions
Please Review Entire Procedure Before Starting Step 1 - Remove Mirror Glass
When putting the new cap back on, note the female slot on the inboard side of the cover that fits on the mirror assembly.
These must engage when sliding the cap back on. On the driver's side mirror, make sure that the long finger on the back of the
mirror glass engages the metal fingers in the housing.
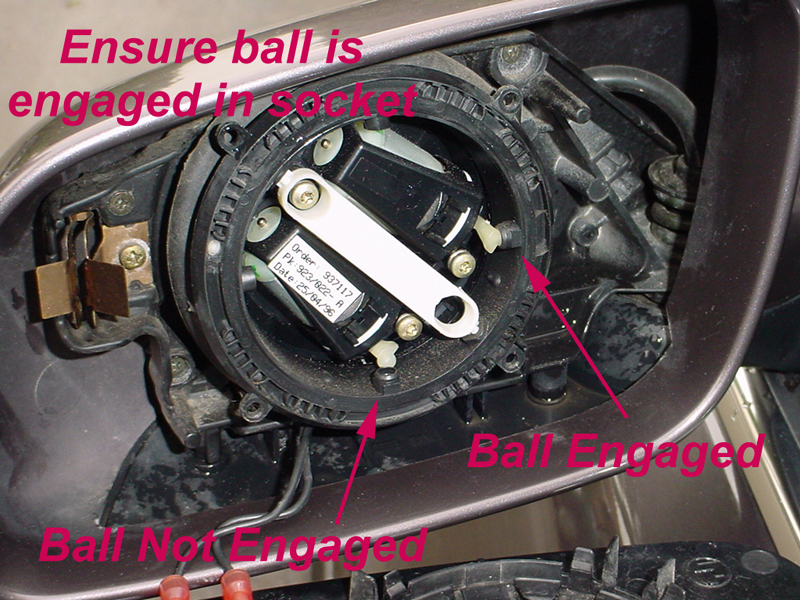
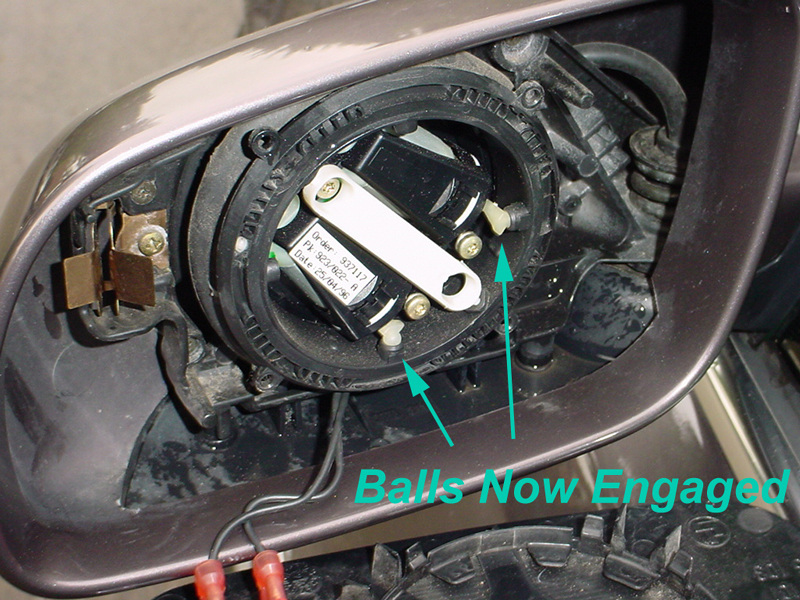
Ensure the ball sockets are engaged prior to fitting the mirror glass. If they aren't, the mirror won't go either up/down or
side to side depending on which ball socket is not engaged. There are two total. If one of the balls came out of
the socket, just pop it back in using your fingers. ENSURE IT "POPS" BACK INTO THE SOCKET. The second picture below shows it just sitting on top of the socket, once the mirror was reinstalled, it popped out again. Just use a little pressure and seat it into the socket. It won't come out then. Look at the picture closely and you'll see that it is alligned with the socket, but not pressed in.
Click on the image to view a larger version.
Click on the image to view a larger version.
If car is equipped with heated
mirrors, attach wires to mirrors. It doesn't matter which wire goes on which terminal as long as they are both
securely on a terminal. Reattach auto dimming mirror wire connector if car is equipped with auto dimming mirrors.
Press mirror back glass back into housing. Press on the center of the mirror, use only minimal pressure. BY USING MINIMAL
PRESSURE, YOU WON'T DISENGAGE THE BALL SOCKETS.
Perform an operational check of the mirror. If it works just fine, you're done. If it has trouble going up or down
or side to side, most likely one of the ball sockets became disengaged. Just pop the mirror glass off again, engage
the ball and socket and press the mirror glass back on, using directions above.
You're done, it's that simple! Enjoy!
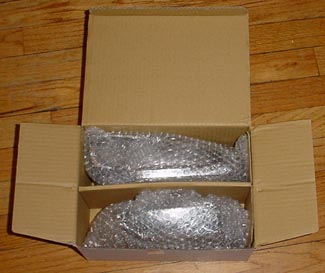
Please note that I do not sell these, look for them on ebay or ebay.de
Technical & Maintenance | Upgrades & Style | Used A8 Buyer's Checklist
Audi S6 Drivers Side Mirror
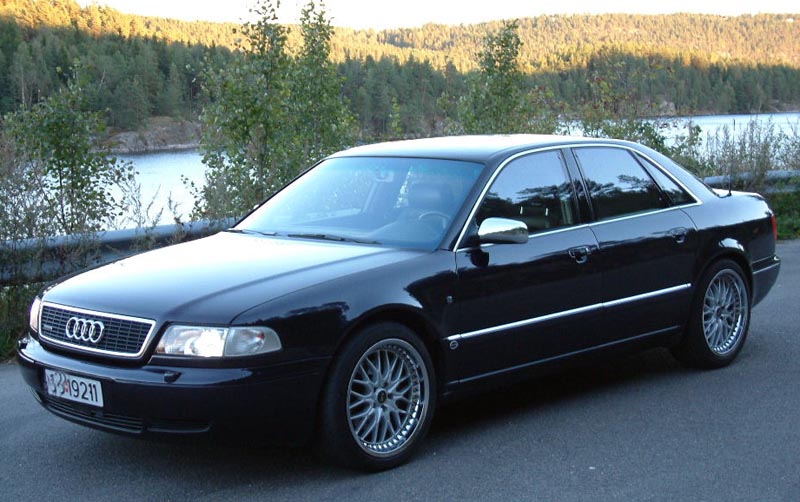
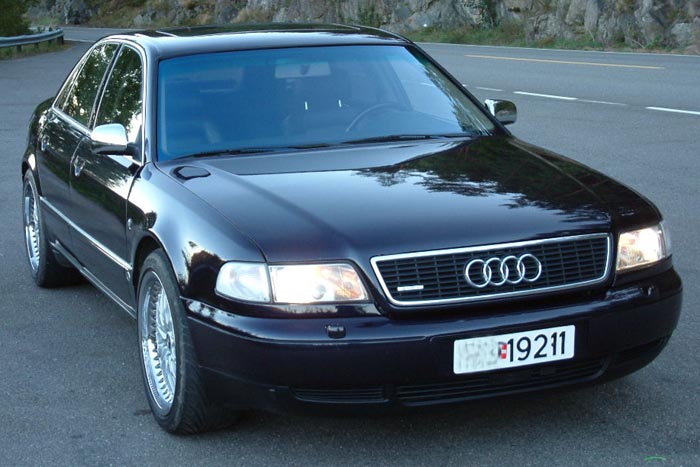
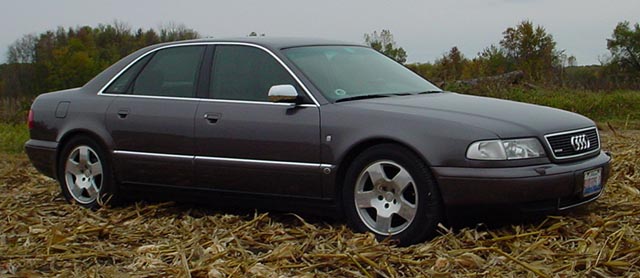
Black Audi A8 with Chrome Mirror Caps
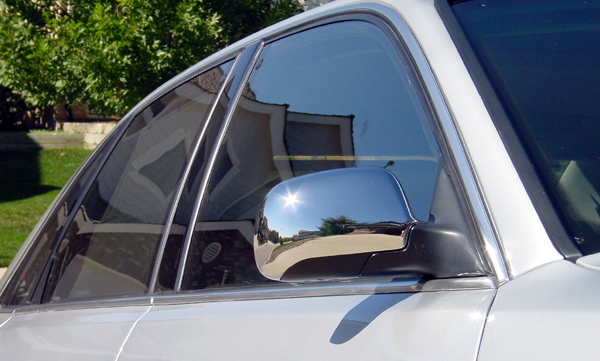

Silver Audi A8 with Chrome Mirror Caps
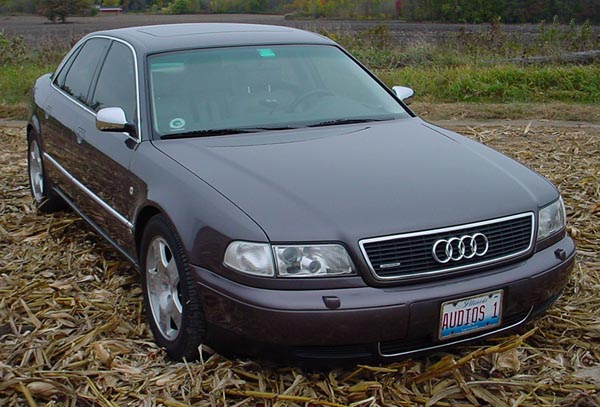

Audi A8 with Chrome Mirror Caps Installed
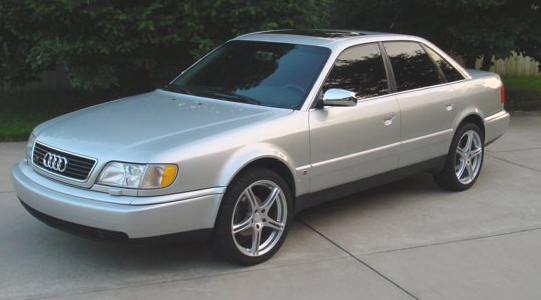
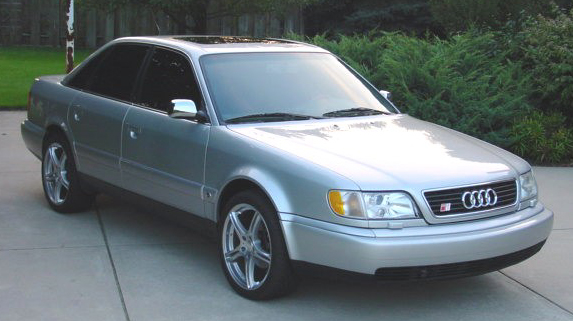
1995 Audi S6 with Chrome Mirror Caps Installed

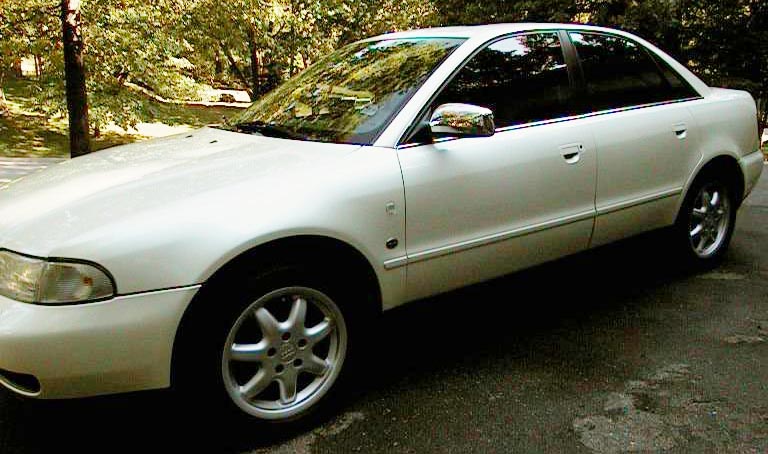
1998 Audi A4 with Chrome Mirror Caps Installed
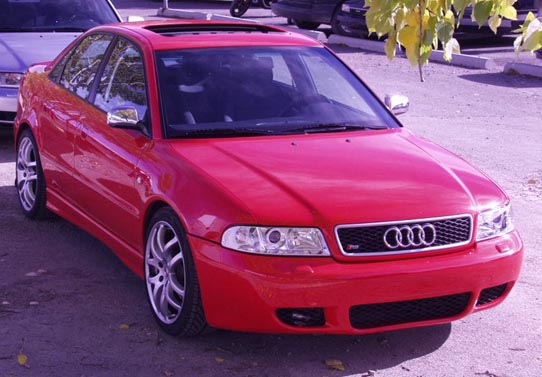

1997 Audi A4 with Chrome Mirror Caps Installed
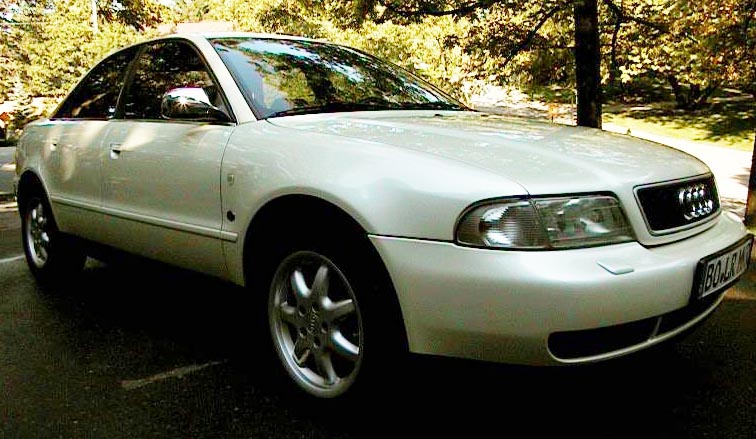
Audi A4 with Chrome Mirror Caps Installed
You don't need to change the right side small mirror,
this kit is for all Audi cars that have the
smaller right hand side mirror.
Installation is a snap!
Installation takes approximately 20 minutes
for both sides and the only tool that is
required is a phillips head screwdriver!
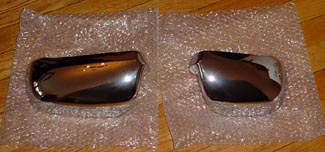
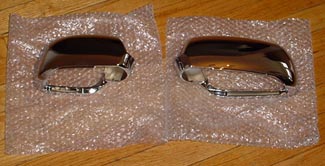
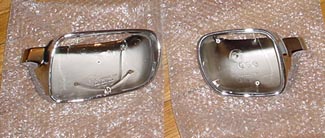
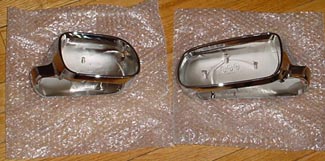
Pictures of Mirror Caps
These caps are brand new, chrome plated plastic.
OEM covers are painted plastic.
These caps are very high quality,
mirror like finish.
They are very hard to photograph. They look fantastic!
These caps are not made by Audi.
Left hand mirror measures 175mm x 100mm (large mirror)
Right hand mirror measures 125mm x 100mm (small mirror)
Model
Year
S6 (C4)
'95-'95.5
S6 Avant (C4)
'95-'95.5
A4
'96-'98
A6 (C4)
'95-'97
A6 Avant (C4)
'95-'98
A6 (C5)
'97-'98
A8
'97-'98
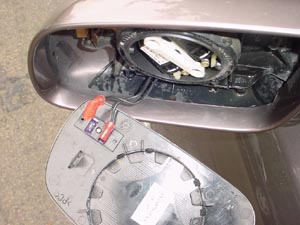
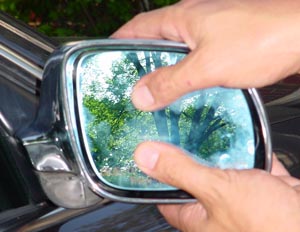
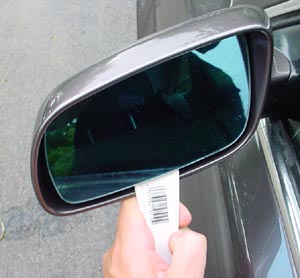
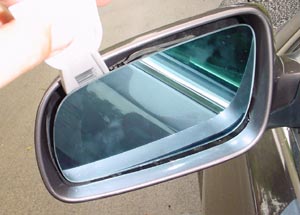
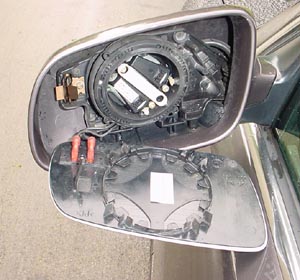
The mirror glass is attached to the mirror assembly with plastic clips on the back of the mirror. Rotate
the mirror as far up as it will go using the mirror control button to get best access to the bottom
of the mirror.
Using the plastic tool supplied with the mirrors, place the fat end of the tool under the mirror on the
bottom and carefully pry out the lens at
the bottom first, then at the top.
DO NOT stick the tool in too far, only 1/2" or so.
Do the bottom left and right side first, then the top left and right side. Look at the
mirror picture, you will see it attaches in the middle, so put the tool just outside of the round circle.
You will need to supply more force than you might think to remove the mirror glass. CARE NEEDS TO BE TAKEN DURING
REMOVAL OF THE MIRROR GLASS.
Remove two wires from mirror if car is equipped with heated mirrors.
If car does not have heated mirrors, there will be no wires attached to mirror glass.
Remove mirror glass from mirror assembly. If car is equipped with auto dimming mirrors, remove auto dimming mirror
wire connector.
Reposition the mirror positioner using the mirror control button back into a vertical position.


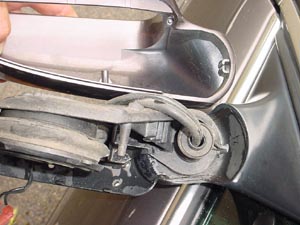
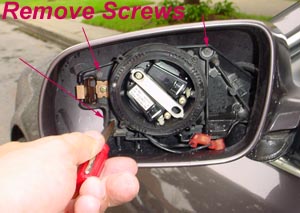
Step 2 - Remove Mirror Housing Cover
Remove the three screws shown in the picture that hold the mirror cover to the positioning assembly.
There are only two screws on the passneger
side mirror. Lift the housing up and out, wiggling it straight up.
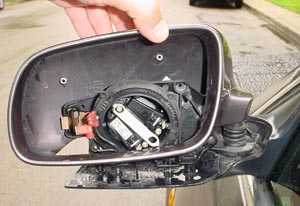
Step 3 - Install Chrome Cover and Mirror Glass
Install new chrome mirror covers. Installation procedure is reverse of removal. A couple of notes:
Ensure the mirror positioner is repositioned using the mirror control button back into a vertical position before starting.
When installing the three or two screws to the cover, ensure they are tight, but don't over tighten them because they
will strip.