This procedure is for the Lidatek LE-30 laser jammer - it has nothing to do with radar, although it might help you if you're installing a remote radar system. Click on the link in my sig or search the forums if this is confusing. If you live in Virginia, California, or any other state where laser jammers are illegal, stop reading this now and please stop speeding!
The procedure takes about two hours and gets two "cheese blocks" on my install-difficulty scale. The LE-30 comes with one transponder, and I opted for an extra one because of the large frontal area of the A8. The new fish mouth grilles will probably require three or four.
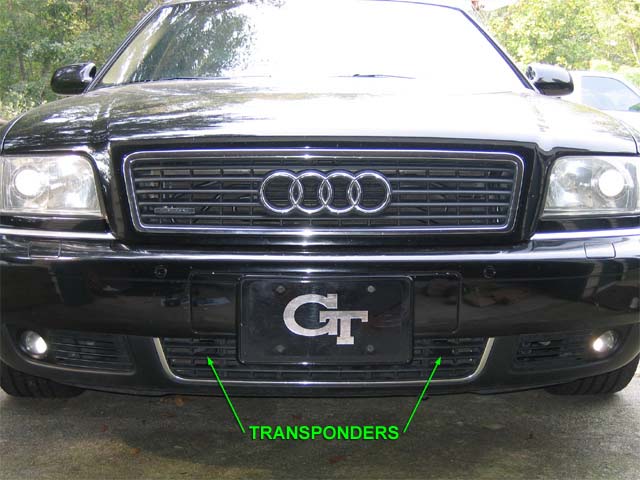
The first thing to do is decide where the transponders will be located. Test-fit them in a location that won't interfere with the radiator or anything else behind the grille. Here are the locations I chose:
They are hard to see, but they're in there. Locating them in the upper grille might be more effective, but this would require routing the wires along the underside of the hood, and the transponders would be subjected to excessive jarring every time the hood is opened and closed. This is not a problem for people who don't check their oil.
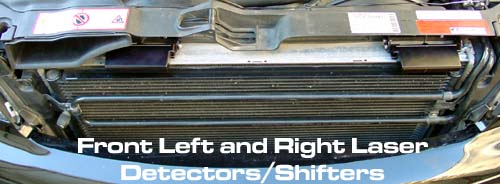
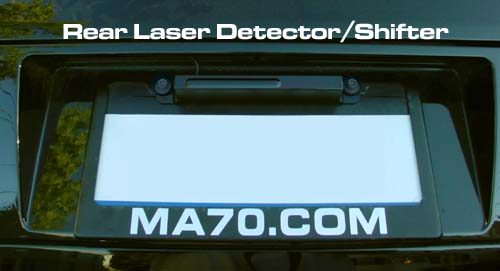
Dan Mac installed his components as outlined below on his 97 A8 4.2.
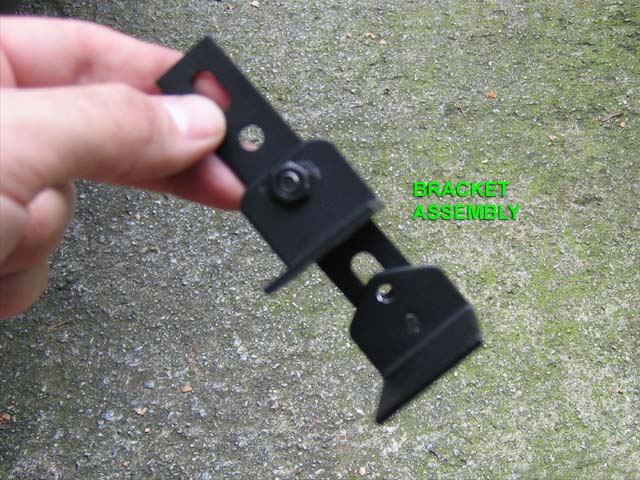
The LE-30 comes with various sizes of steel angles and plates for mounting the transponders. Here is the configuration I used:
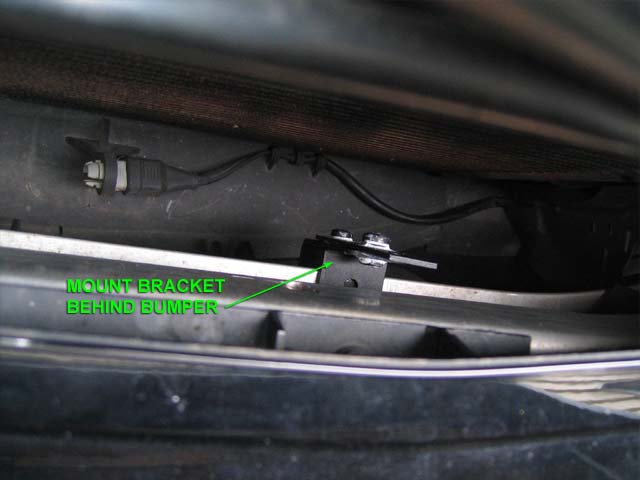
Align each bracket with your desired transponder location, and mount behind the front bumper with the provided double-sided tape:
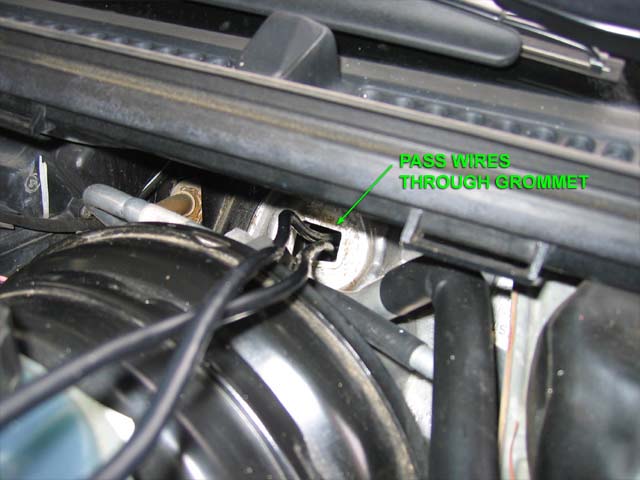
Tape the transponders to the brackets with double-sided tape. Then route the wires across the engine bay (avoiding hot engine parts and xenon ballasts) and through the grommet below the driver's side windshield wiper:
The easiest way to go through this grommet is to pull it out, cut a small hole in it, and push the wires through. Don't forget to seal the hole with silicone when you're done, or you may notice an unusual smell in the car after a few heavy rains. Tie off any excess wire with twist ties.
Remove the lower dash panel (this procedure describes it in detail). To do this, pry off the plastic screw covers with a flathead screwdriver and loosen the screws with an allen wrench. Pull the wires through from the engine bay and plug them into the LE-30 box. There is plenty of space in here to attach the box with double-sided tape - just pick an out of the way place.
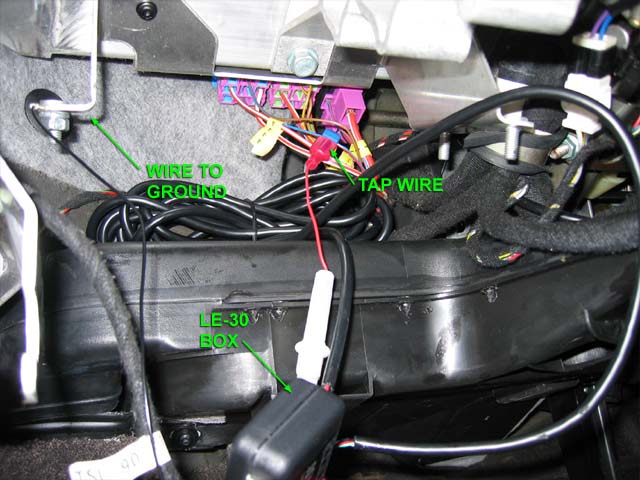
For the supplied power wire, use the provided blue wiretaps to tap into a wire that only has power with the ignition on. I am not an electronics wizard, so I can't give you any guidance other than this photo (which does work btw):
Don't forget to use the grounding wire, as shown. Attach the speaker with double-sided tape in here too; it's loud enough that you'll hear it even when the dash is put back in place. This is a good point to test the system - turn the ignition on and flip the switch. You should hear a short beep and then one longer beep for each transponder.
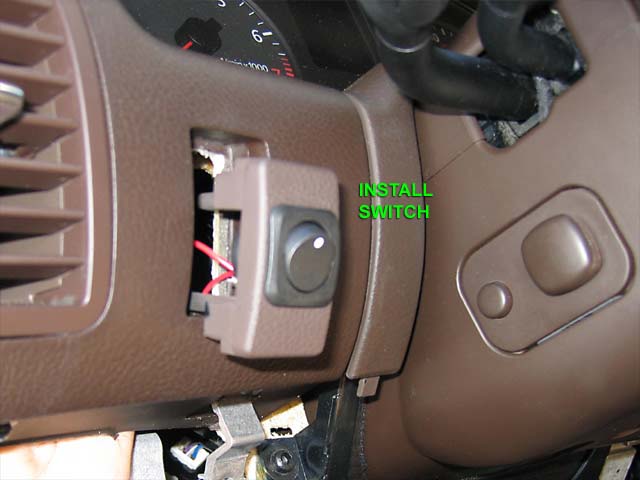
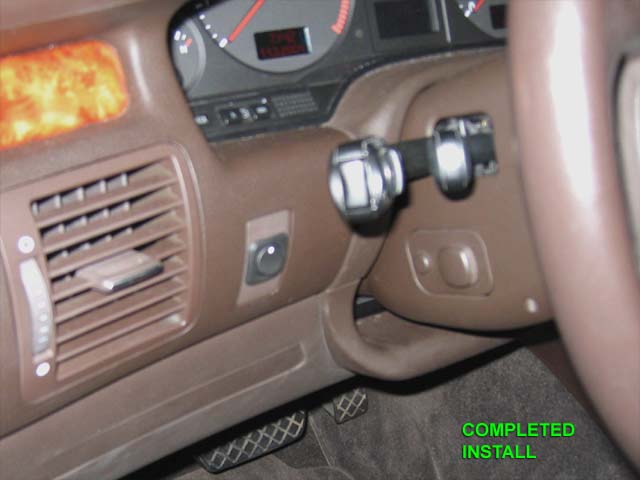
I didn't like the provided power switch, so I bought a replacement from Radio Shack (part #275-693, less than $3). There's a blank cutout just to the left of the steering wheel that makes a perfect location for the switch (PaulW used it for his XM radio switch). Pry it out with a flathead screwdriver and drill the proper size hole in it. Press the new switch in, attach the wires in back (cut off the provided switch), then pop the whole thing back in. Very easy and very OEM-looking:
If you want to use the supplied LED, route the wire between the dash and the door trim, up to the base of the A-pillar. It will stay there pretty well without any mounting or tools.
You can use the speaker or the LED, or both- they do basically the same thing.