Audi A8 Final Drive - Rear
Input Seal Replacement
By Bob Dunne
Problem
This procedure outlines the repair of the rear differential input seal. These leak where the driveshaft connects to the rear final drive. If you see fluid dripping down the front and/or bottom of the differential (connecting to the rear wheels) then it needs to be replaced. Audi calls it a “Drive Shaft Sealing Ring".
This seal is a bit more complicated to replace than the final driver rear output seals as shown here and I'll explain why. First, there are a few more steps involved and the seal itself is pretty hard to remove. You will also need a few more tools than normal. If you have come this far, one option would be to remove the rear differential completely and replace all three seals on a workbench. Like the output seals, this can easily be done on the car though.
For further reference, this procedure is covered in sections 36-104 through 110 in the Bentley manual.
Time
Figure about 2- 3 hours
Parts Required
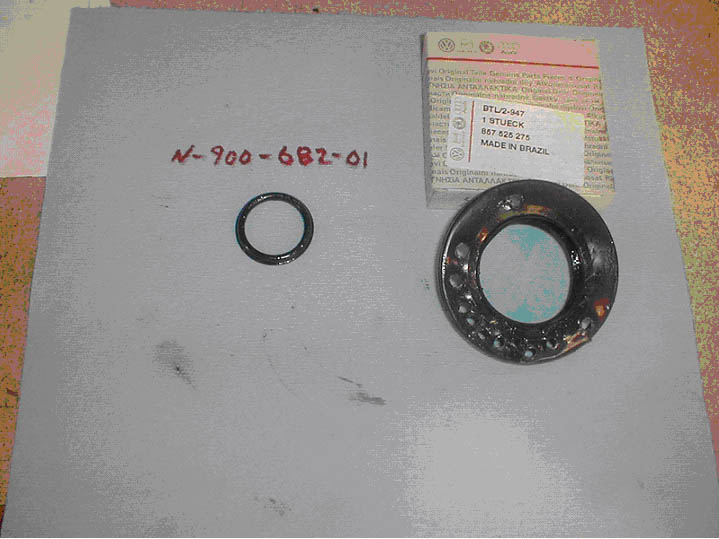
Seal - 857-525-275 about $40 at the dealer
Nut - 014-311-379 about $4
Washer (o-ring) – N-900-682-01 - $1
Audi gear fluid
Driveshaft flange seals – 8D0407309
Loctite
Tools Required
Hex socket set (3/8" drive is fine)
Harmonic balancer puller ($20 or so)
3/8" socket drive, flex head, extensions
Weighted slide handle seal puller (a regular seal puller will not work)
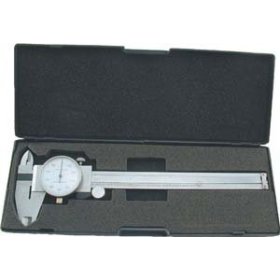
Vernier caliper
36mm socket
46mm socket – optional for installing seal
Pick to remove internal o-ring seal
Procedure
1) At this point, drain the rear differential (10mm hex plug in bottom, fill is same size on Pass side) if you want to change all of the fluid. If not, you can proceed and then top off when finished. Important, make sure that you can remove the FILL plug before removing the drain plug so that you're not stuck with an
empty differential and no way to refill it!
2) Mark the position of the driveshaft flange to the differential with some paint so you can install in the same position. Using the 6mm socket, remove the six bolts that hold the driveshaft to the differential flange. This is where you will have to rotate the shaft in some way to get access to all 6 bolts. Tap the driveshaft at the flange so that it drops down away from the differential. This might take a few whacks to get it separated.
Once it's disconnected, move it to the side, and hang with a bungee cord. You want to keep the driveshaft flex to a minimum.
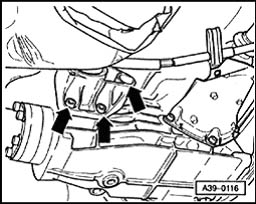
3) For the next step, you will want to use a floor jack or bottle jack to support some of the weight when you remove the differential bolts. It's not a lot, because you're only disconnecting one side, but plan on something to help support the weight while you perform the rest of the procedure. Now, remove the three differential mounting bolts (see pic below). They're hex bolts on the driver's side. Two are next to each other and pretty visible. The third is in the same general area but recessed. You'll have to come up with a combination of short extensions in order to remove this bolt.
Once the third bolt is removed, the differential will tip down to one side and give you much better access to the center bolt and flange. If it doesn't move by itself just pull on it a little bit to move downward. It will drop 3 inches or so, just make sure most of the weight is supported on the bottom.
Now the fun begins….
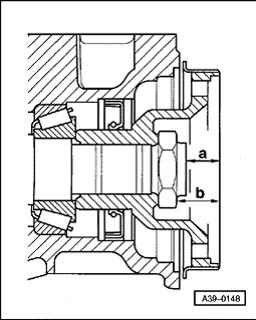
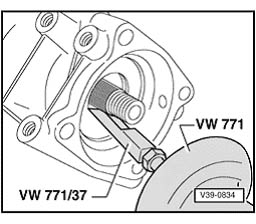
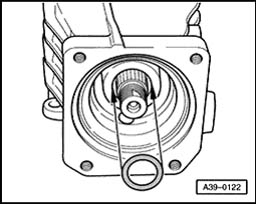
4) At this point, you need to take some measurements so that the differential flange is installed at the same depth prior to removal. Refer to Bentley picture below.
A vernier caliper is a good tool to take the measurements. Use something (a file for example) that you can lie across the flange and measure the depth from that point. Use the depth part that slides out of the bottom, not the caliper end at the top. You need to take the depth measurement from the middle, which is why I put something across the flange for the caliper to rest on. It's not critical what the measurements are, they just need to be the same for reinstallation.
4) Once you have the measurements written down, pry away the “staked” part of the nut in the center. It was crimped in at the factory and you will do the same with the new nut.
5) I marked the position of the flange and the differential with some paint so I could put it back in the same position (not visible in the pic below). Using a 36mm socket, remove the nut. An impact gun makes this easy, I have not tried by hand.
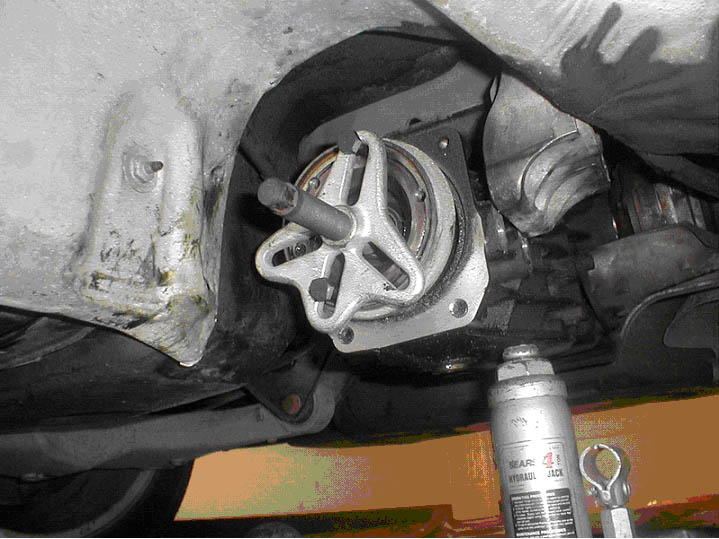
6) Once the nut is removed, you are ready to remove the flange. A harmonic puller is ideal for this job. They are pretty inexpensive and worth buying if you don't have one already.
The flange comes off pretty easily, as a matter of fact, the last one I removed just required turning in the puller bolt by hand and the flange slid right out.
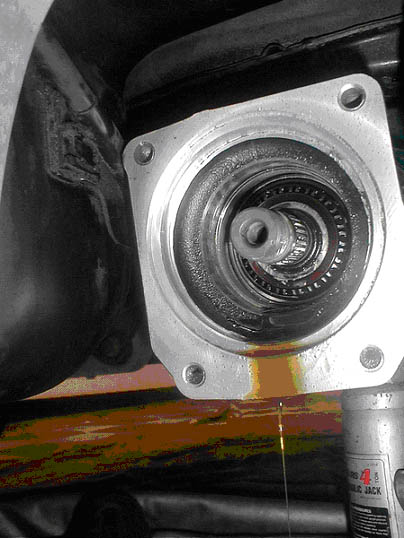
4) Now you are ready to remove the seal. Take note, or measure the depth of the seal, as you will need to “seat” the new one the same depth.
If you haven't drained the rear differential, gear oil will drip out once you remove the seal.
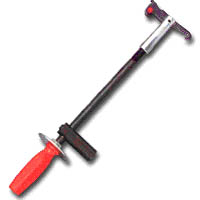
You will not be able to remove this seal with a regular seal puller. I tried unsuccessfully and wrecked one in the process. One very crude method is to drill holes into the seal and use a body dent puller (see pic below). The next time, I wised up and got a seal extractor which threaded onto the same dent puller – off in two pulls.
Get a tool similar to this to pull the seal.
Bently Picture showing seal being pulled.
"Shotgun" method of removing seal, not recommended, O-Ring
Old Seal Ready for Removal
Watch the gear lube leak on your garage floor.
9) Look inside and you will see a small o-ring on the center shaft. Using a pick, remove it and replace it with the new one. Rub some gear oil on it to make it easier to install.
10) You are now ready to reinstall the new seal. I happen to have a 46mm socket which is the perfect size to reinstall the new seal. You can probably use a smaller socket going around the outside and do the same thing. This is a high compression seal so it will be tight getting started. Make sure that it's even all around and at the same depth as the old one. Rub some gear oil on this seal too.
11) With the seal and o-ring installed, carefully clean up the flange with some superfine steel wool or cloth and rub some gear oil onto the shaft. Now, slide the flange back into place. It doesn't require any force and will slide in easily.
12) Clean up the pinion threads (what the nut threads onto) and apply some Locktite. Thread the nut onto the shaft and prepare to tighten. I didn't find a torque spec, this is where the measurement comes into play. I threaded two of the CV bolts into the flange and used a pry bar to “lock” the flange in place while tightening (same method shown here. It doesn't take much to get it in the right position.
Take another measurement, and if you are at the correct depth, stake in the nut to lock it into place. A sharp center punch works well.
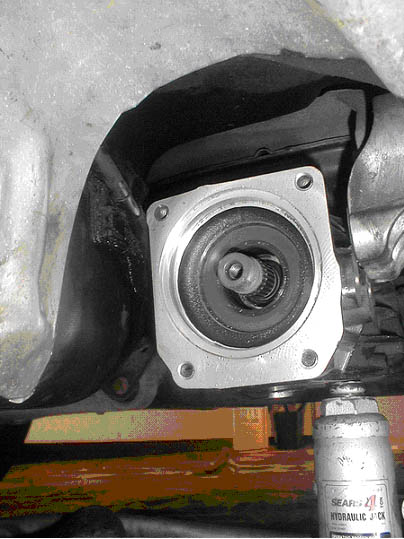
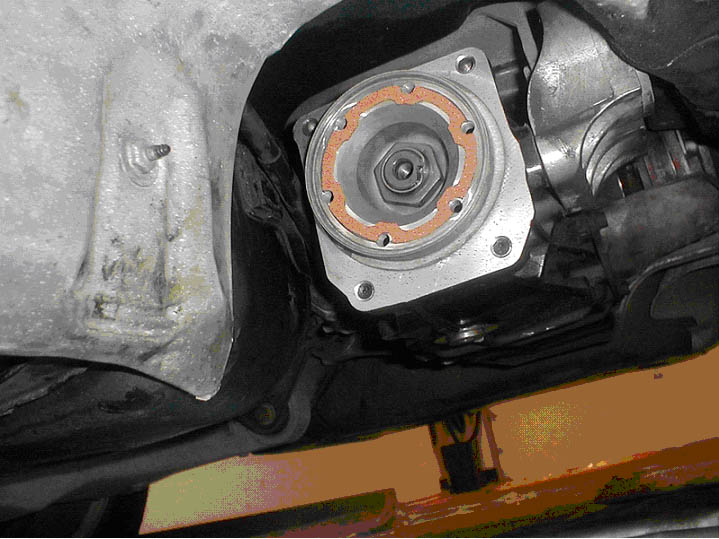
New seal installed, new nut staked in place, new flange seal.
13) Reinstall differential bolts (30 ft lbs).
14) Reinstall driveshaft bolts (41 ft lbs).
15) Top off differential fluid (both drain and fill plugs are 26 ft lbs).