Technical & Maintenance | Upgrades & Style | Used A8 Buyer's Checklist |
|
Symptoms of defective immobilizer wiring Your car starts as normal, but then within two seconds cuts out and the immobilizer warning light starts to blink. | |||||||||
|
Car in question Audi A8 D2 platform from October 1995 UK specification, but apparently other models in the Audi range can suffer from the same problem. | |||||||||
Related fault codes (DTCs)
| |||||||||
 History of the fault
Over the last three months or so my car would occasionally cut out as described above. Generally it would start properly after repeated attempts, and then stay on until I switched it off at my destination. However, last Friday things got worse and the car would not stay on at all and in the end had to be road lifted back home. I remembered reading something about this in a backissue of Car Mechanics Magazine and the problem seemed straightforward enough to put right. In the magazine's article about servicing an Audi A8 they mention the following: "if an A8 (A4 or A6, for that matter) starts then stalls almost instantly, then it's probably due to a fault in the connection between the coil reader in the ignition barrel and the immobilizer control unit" Source: Car Mechanics Magazine May 2005 This magazine gave the repair work involved three out of four thumbs down, but I think that's a bit harsh. If you're careful you should be able to do it yourself. Naturally, an unmatched key would also cause the immobilizer to cut out the engine, but I knew that couldn't be the cause of the problem as it is my own car... | |||||||||
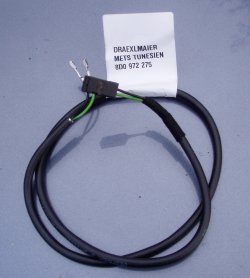 Parts required
Only the wire needs replacing. It costs just over 15 pounds from a main Audi dealer. Immobilizer wire part number 8D0 972 275. | |||||||||
|
Tools required Replacement of the wire is an easy task even if it can be a bit fiddly. Tools required are:
| |||||||||
|
Time required It shouldn't take more than two hours to complete. | |||||||||
Tightening torque
| |||||||||
|
Procedure Basically it boils down to the following steps:
| |||||||||
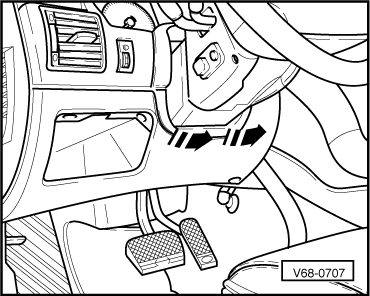 Remove under steering column dash trim
Gently lever the lower surround out in direction of arrow. | |||||||||
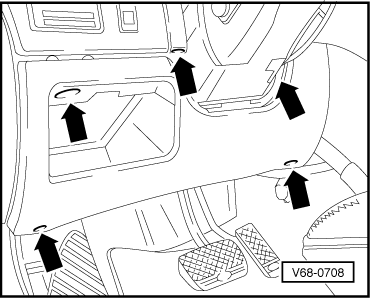 Unscrew the bolts and remove lower storage compartment.
| |||||||||
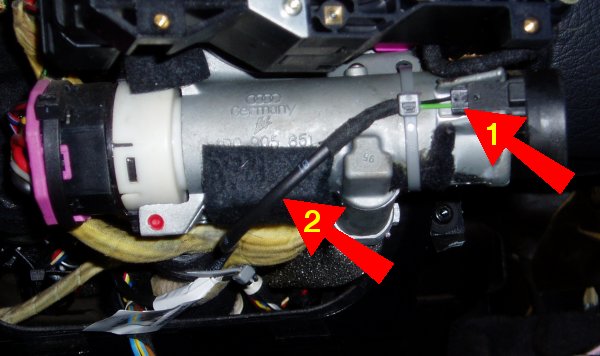 Replace immobilizer wire
The wire (2) connects to the coil reader with connector (1) and is routed underneath the steering column from (3) to (4), the immobilizer module. | |||||||||
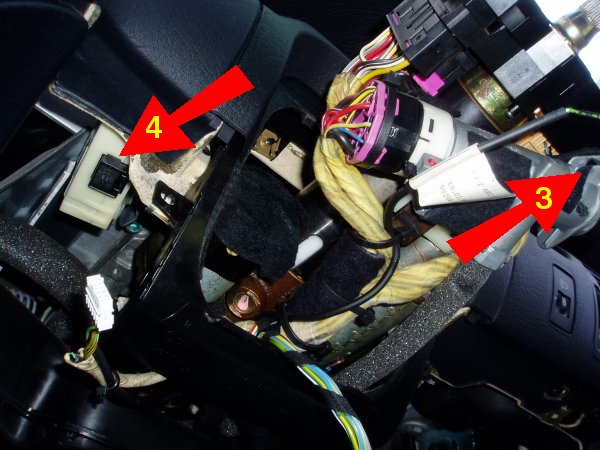 My car is a UK spec car, so the steering wheel is on the right hand side of the car. It could well be that the immobilizer unit (4) is always between the steering column and the center console, so left hand drive cars might have the module on the right of the column.
| |||||||||
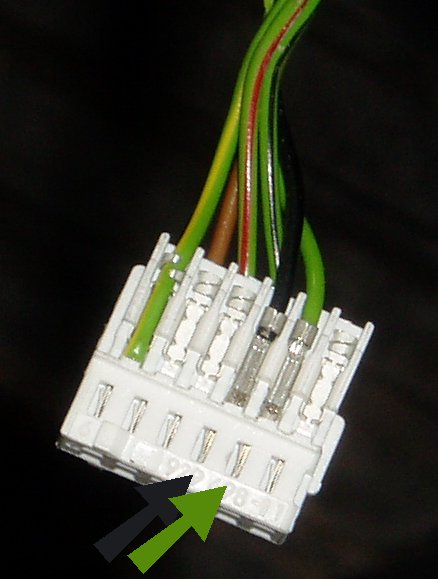 This is the fiddly bit as you will have to pull out the two wires and put the new ones in. If you use a thin screwdriver or a sharp knife you will be able to bend the little locking metal strips back and the cable including the metal connector should slide out easily when you pull it at the top.
At moments like these you wish you had three hands. | |||||||||
|
Finishing off Once everything is put back together, clear the errors codes using VAG-COM or similar, re-enter the radio security code, switch the airco back to degrees F (explained in Paul's article: Ignition Switch Replacement), start the car a few times of course to see if it is all working properly, and take it for a test drive. Finally check the fault codes again to see if they haven't returned. |
Technical & Maintenance | Upgrades & Style | Used A8 Buyer's Checklist |