Navigation Plus Design Issues
in a 97-99 A8
By Paul Waterloo
Last Updated 12/11/03
Overview
I will be installing an European Audi Navigation Plus in my 1997 A8. If you'd like to learn more about the Navigation plus, visit Dan's Audi Navigation Plus site. It has almost everything you need to know. Just about every bit of information is there, you just have to read it.
The following discusses design issues with integrating the Nav Plus unit into the pre facelift A8. It easily integrates electrically, it's performing the mechanical modifications and additional electrical modifications that makes it a challenge. This is what I'm planning to do.
Navigation Plus Integration (electrical)
The Nav Plus will electrically integrate very easy. Remove the radio, remove a few pins/wires from the radio harness plug and get a new 26 pin connector and plug the wires into the applicable locations. These electrical connections and described here. A GPS antenna is also required to be installed.
Navigation Plus Integration (mechanical)
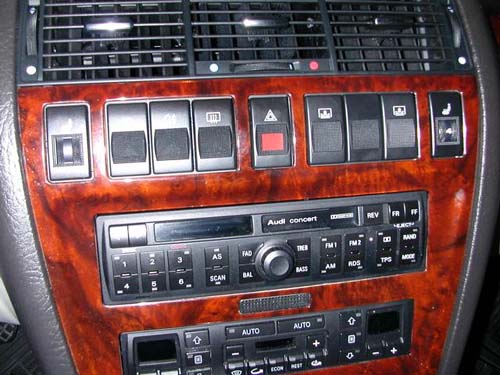
The 97-99 came with a single DIN radio mount with either the Delta or Concert radio. This poses a problem for installation of the double DIN Nav Plus unit.
97-99 single DIN radio installation into the center console.
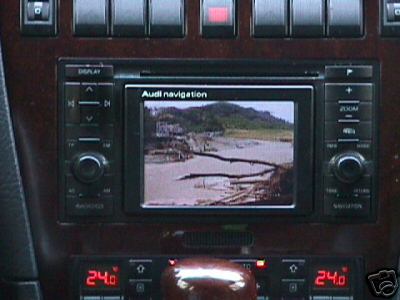
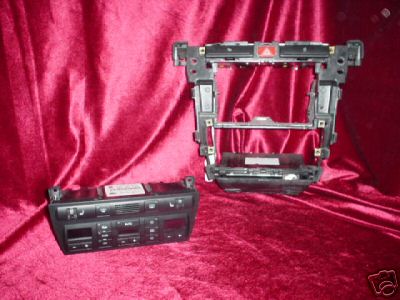
The Nav Plus C type did come on a few A8/S8's in Europe, these units had a different center console plate shown below.
Pre facelift A8 with Nav Plus C type installed. Note the unit is square.
I purchase the type C unit (which will talk with the center display on the 97-99 model years, to talk to the center display on an 00 and newer, you need a type D unit). I figured I could get a center plate from Audi or from Europe off a used model. I have yet to track one down, and the parts are about $1,000 from Audi and I don't know if you can even get them.
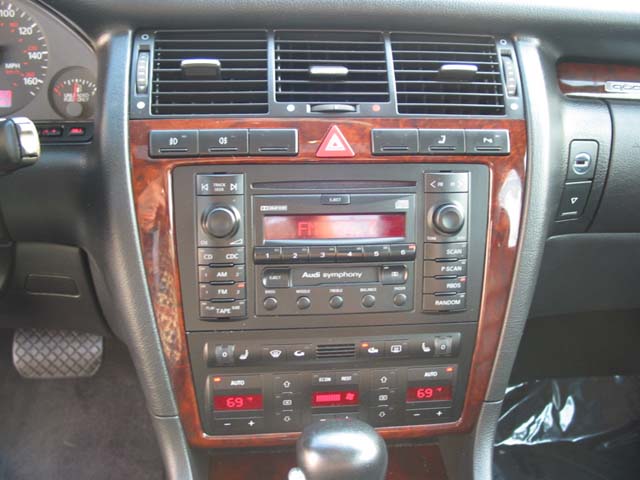
So I went and bought a center wood panel from a U.S. bound 00 parts car from a junkyard and the bezel that mounts behind it along with the switches at the top of the panel. Here is a picture of an 00 panel, note different type switches (and that the defroster and seat heater switches are relocated to the climate control head unit). The radio unit is not square either, it is tapered on the side trim.
00 and newer center console and double DIN radio. Note defroster switch
and seat heaters are now on climate control head unit.
I now need to retrofit the 00 panel to my 97. I will not use the 00 and newer climate control head unit due to compatability problems. This will include:
Removing old center console and bezel behind it
Install new double DIN bezel
Switching from old type to new type switches
Perform necessary wiring changes to use new type switches on the 97
Relocating the defroster switch to the left side of the steering wheel (where the headlight adjustment switch would be found on a European model)
Making a custom panel to fit the 1997 climate control head unit below the Nav Plus unit
Relocating the seat heater switches to this custom panel
Why not use the new Climate Control Head Unit?
Relocating the seat heater and defroster switches pose a real problem because the facelift cars do not have switches up high for them. They most likely went to the low profile switches because they need the room for the double DIN radio. When checking to see if the facelift climate control unit would work on the pre facelift cars, it was determined that it is almost identical, but has a few slight differences. The biggest one being the facelift model has a CAN high and low input (this gives the unit car speed, outside temperature, and other "central" signals). The pre facelift car has four seperate wires that run from the instrument cluster board computer to the climate control head unit. It's a different architecture, and I do not have the technical resources to integrate the two.
Therefore, the existing climate control unit will be installed in a custom built lower panel below the radio and the seat heater switches and HVAC air sampling vent. The defroster switch will be relocated off the center console.
Installing New Console Bezel
I have not received the bezel yet, but the following is a picture of an A6 bezel, it sits behind the dash.
A6 Double DIN Bezel and climate
control head unit for Illustration Purposes.
This should not be that difficult to install, I have already had the whole center console removed on my car before (well, maybe easy for me because I've done it already).
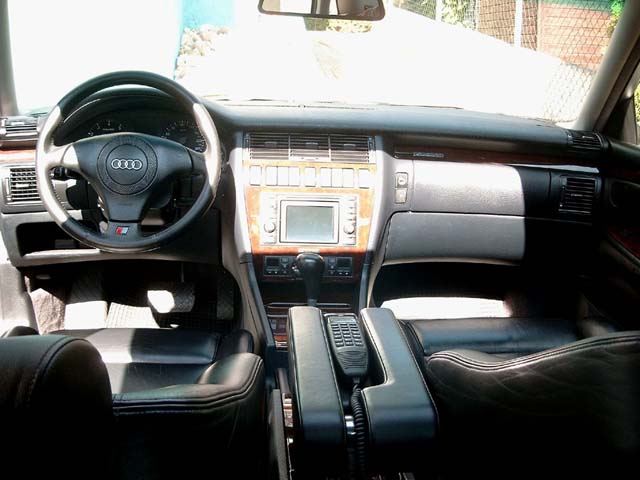
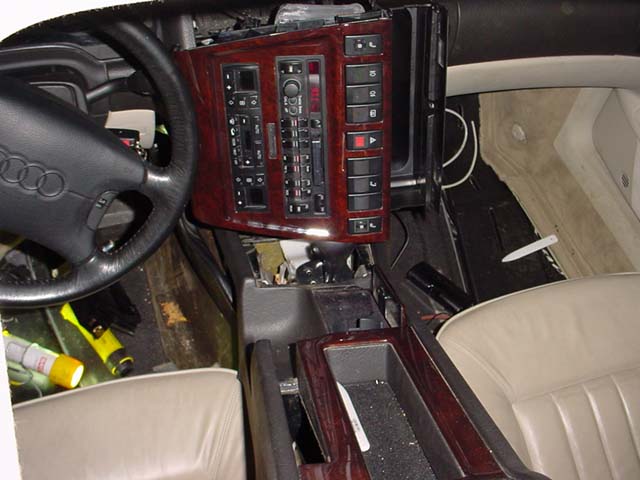
The center console removed on a pre facelift model.
Rewiring Switches
The plastic connectors on the wiring harness are different for the pre facelift and facelift switches. I will purchase the connectors for the new switches at the dealer, push out the wires from the pre facelift connectors and push them into the applicable holes on the new connectors. I have checked the wiring diagrams and the new style switches might not be exact, but they have the correct amount and type of terminals needed to hook the switch wiring to. I have made notes and will have to reconfigure the wiring on the new connectors. The only switch that I have not fully figured out is the hazard switch, but it appears it will work.
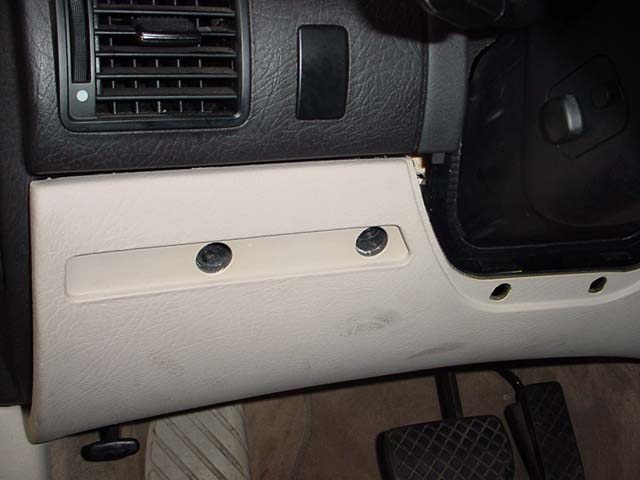
It will probably be easiest and look best to relocate the defroster switch to the left side of the steering wheel. There is a location for a switch, I hope it has a bezel behind the blank right now. If there is, I will make an extension harness and run the defroster switch wires from the center dash location to its new location. Should be straight forward and easy. Another advantage is that I will not have to buy a new switch.
Defroster switch will be relocated to left side of steering wheel.
Making a new custom climate control panel
I will have to make some kind of custom climate control panel to cover the console bezel. It must house the climate control head unit, two seat heater switches (planning on putting them on their side) and the HVAC sampling vent.
I will most likely cut up my 1997 bezel and use the insert for the head unit and attach it to the 00 bezel somehow. I will also consider cutting the bezel to remove the seat heater switch holding bucket and attach it to the custom panel. Once it's all done, I'll most likely have somebody make a custom black (to match the dash) vinyl cover or wood plate. Somebody who can cut it out and make it look factory.
Because the Nav unit is a type C unit (and is square and not tapered), it will also most likely need a small plate around it to fill up the gap to the wood.
I'll try to update this page as time goes on.....if you have any ideas that will make it easier for me or how to do it a different way please email me!