General
The Nav Plus unit needs a GPS antenna to operate the navigation system. The Nav Plus unit provides power to this antenna. If it is not working correctly, it can be troubleshot using the ross-tech software or other compatible scan tool.
Installation Locations
The GPS antenna can be installed in a number of locations, here are a few:
Using an aftermarket Bosch antenna mounted on the dashboard
Using the stock GPS antenna on the trunk if equipped
Using an aftermarket Bosch antenna mounted under the rear hat shelf
Installation on the Dashboard
This is the most simple option. Just use the supplied sticky tape with the antenna and mount it on the dash in the left or right forward corner of the windshield and route the wire to the Nav Plus unit. See supplied instruction with antenna for correct mounting locations.
Stock GPS Antenna
If your car came equipped with a navigation system, you can use the stock GPS antenna located on the rear trunk. You will need to procure a special connector cable to run from the trunk where it ends right now up to your Navigation Plus unit. If you know the name of this type cable....please email me and I'll update the page.
Run the extension cable from the trunk to the dashboard by removing the inner driver's side trunk panel to gain access to the wiring. The procedure to remove the inner trunk liner can be found here. Pass the antenna through the trunk to the passenger compartment via the stocking wiring locations.
Follow the procedure below to remove the rear seat back to gain access for installation and to route up to the Nav Plus unit.
NOTE: If you have the hot weather package on your A8, this option is best. If you do not have a stock GPS antenna, consider purchasing a unit that can be mounted outside the car such as the stock unit. If you do purchase one from Audi, it will require painting. If you come across any good antenna, please email me and I'll update the page. This is just my opinion, I have not heard of anybody that has installed a unit under the rear hat shelf with a hot weather package. If you have good reception with this type of set up, please email me.
Aftermarket Bosch Antenna Under Rear Hat Shelf
This is what I did, my car does not have the hot weather package, and this worked great for me. Perfect reception, I am usually getting 7 or 8 satellites received at all times. I like this method because the antenna is not seen, it is mounted under the rear hat shelf, which requires it to be moved to mount the GPS antenna.
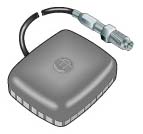
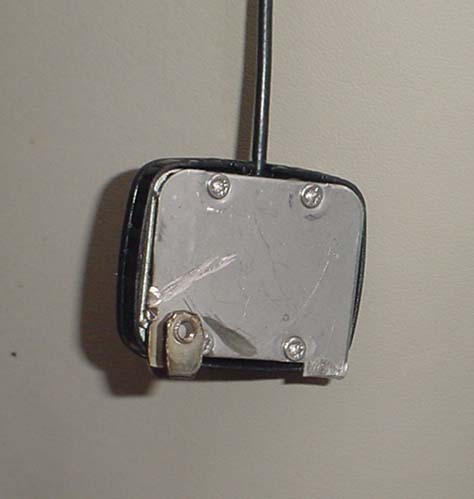
Aftermarket Bosch Antenna
GPS antenna with supplied bracket mounted
and modified for installation. You probably
don't need to cut the one arm off.
The rear seat bottom and back must be removed for this procedure. The rear seat back has airbags in it. I did not disconnect the airbags, I moved the seatback forward just enough to move the hat shelf slightly. I DISCONNECTED THE BATTERY PRIOR TO REMOVAL OF THE SEAT BACK. Do this at your own risk, and be sure you are aware of the precautions you must take with airbags. The Bently manual discussing removing the airbag connectors when removing the seat back. But I did not have to remove the seatback from the car, moving it forward 6" was enough.
Disconnect battery in trunk by removing ground terminal connector.
Remove lower seat cushion by unscrewing two screws under the front face of the seat, shown as "1" in the picture below. You don't have to remove the seat bottom from the car, but if you do, disconnect electrical connectors before removal.
Remove screws 1, lift bottom up and out, move forward.
To remove the back of the seat, unscrew two screws at the bottom shown as"3" in picture below. Then lift the seat up and out. Be careful not to pull it to far forward, it will have the airbag connectors still connected. If you would like to remove it, review the procedure in the Bently for removing air bag connectors before proceeding.
Remove screws "3" and lift seat up and forward.
I thought I would have to disassemble the seat belt parts that are visible, which after completing the procedure, it doesn't appear that you have to, they just stay attached to the hat shelf. If you were removing the hat shelf from the car, it would be required, but not if you are just moving it slightly to mount the GPS antenna. Leave the seat belt components in place.
Remove spring clips (2 and 13 below, there should also be one more in the middle).
Remove the spring clips 2 and 13 on the front edge.
Now the Bose speakers must be removed. Laying in the trunk, unscrew the cover for the Bose speaker (4 screws) and unscrew the Bose speaker (2 screws). Repeat other side. From inside, remove speaker and disconnect electrical connector.
If you vehicle has a rear sunshade, unscrew mounting nuts in luggage compartment, and raise shade box so screws are released from hatshelf.
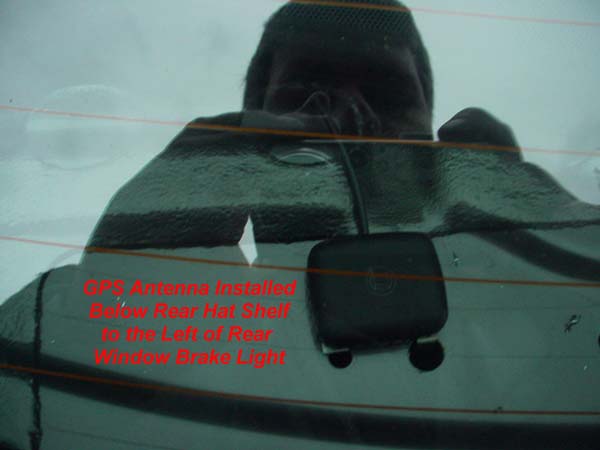
Now pull the hatshelf slightly forward, disengaging the three tabs at the back of it at the window. Now you have access to the under side of the rear hat shelf. I mounted my antenna just to the left of the rear window brake light. See the picture below, it was mounted in the left two holes seen in the picture. Check to see if the two holes are the correct distance for GPS antenna bracket.
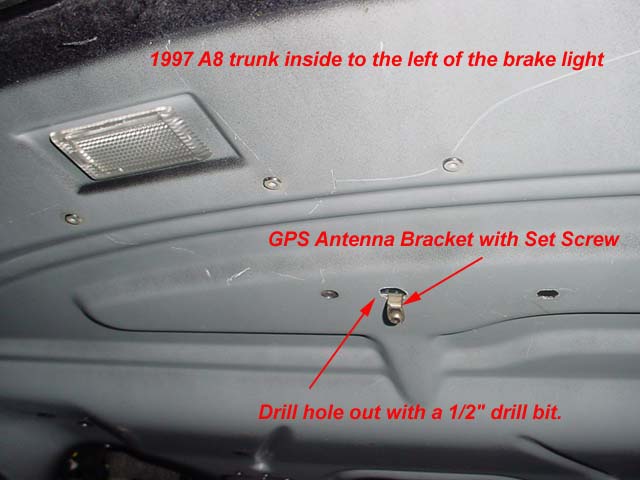
GPS antenna mounting location. Note hole was drilled out using a 1/2" drill bit.
I mounted the little metal bracket that came with the antenna and trimmed it down to fit. I ended up cutting one of the mounting clips off, but in hindsight, it appears it would of fit perfectly after drilling both holes.
From inside the trunk, enlarge the existing hole (s) with a 1/2" drill bit.
Enlarge existing holes for mounting location.
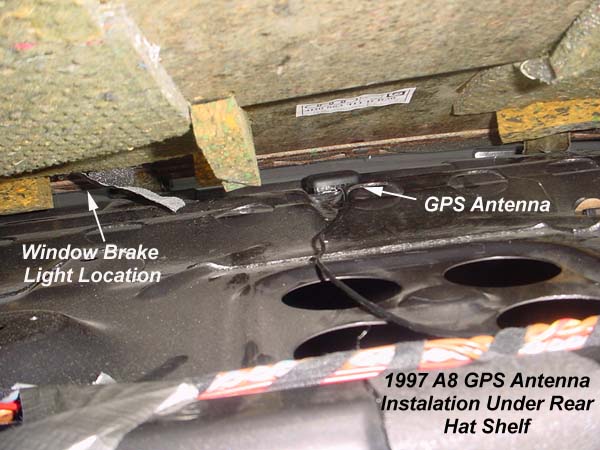
Install the GPS antenna in the enlarged holes. Secure from the trunk with the supplied set screws. All you need to do is lift the hat shelf up and forward slightly to drill and get the antenna in place.
GPS antenna installation under hat shelf.
Run the wiring over to the driver's side of the hat shelf. Route with factory wiring down seat back location and along the rocker panel trim. I ended up just using a plastic spatula to insert it into the rear rocker panel trim and B pillar trim. I removed the driver's side rocker panel trim by popping it out from the rear. Then run the wire behind the trim located below the steering wheel. The procedure to remove this piece of trim is here. Might as well put some tape on that bracket as the procedure states to prevent a future rattle.
Route it to the Nav Plus location in the dashboard. Secure the antenna with tie wraps or tape as required along the route.
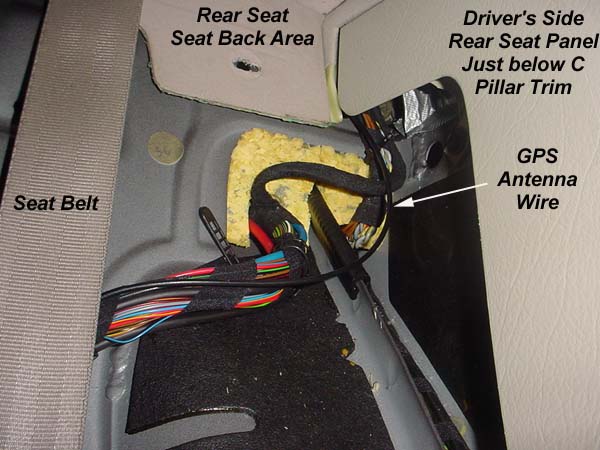
Routing the antenna wire down the rear seat back frame.
Installation of rear seat trim is reverse of removal.