audipages A8 Upgrades

Technical & Maintenance  |  Upgrades & Style  |  Used A8 Buyer's Checklist

Marketplace  |  On Track  |  Gallery  |  Links |  Contact |  Home

Retrofitting a Tiptronic
Steering Wheel
By Paul Waterloo


If you have a 98-2003 A8/S8 and want to retrofit a tiptronic steering wheel, here is your procedure. It won't work on a US 1997 A8 because the self cancelling ring is a totally different design and won't work with the S4/S8 steering wheel/cancelling ring that you'll need.


Tools and Supplies Required

Steering Wheel and Self Cancelling Ring
You will need a donor steering wheel with tiptronic controls. You can get one from a S8, S4, B5 A4, etc. You need a single stage air bag wheel. The newer type dual stage airbags are wired totally different and work different. Do your research on this.

The self cancelling ring is the device that brings the electrical connections across the steering column and allows them to be wired into a steering wheel that rotates. This is accomplished by wiring the stationary side to the rotating side with a 10' ribbon cable that can be rotated and still maintain continuity. NOTE WARNINGS BELOW ABOUT SELF CANCELLING RINGS.

If you have a pre facelift A8 or a facelift A8 WITHOUT ESP, you can get a new self cancelling ring from the dealer for relatively cheap, about $100 or so. I do not have the part number, but you need a self cancelling ring with tiptronic function, your dealer can give you the part number.

If you have ESP, you will need the following self cancelling ring: 1 J0 959 654 M

Don't try this procedure for a car with ESP without having VAG-COM or the ability to bring it to somebody who can calibrate the steering wheel angle in the self cancelling ring. This is not the easiest procedure to accomplish.

This is a very expensive part because of the steering angle sensor circuitry that is installed in the self cancelling ring, about $400. Getting them used is a crap shoot. If somebody has turned it round and round, it could be unusable.

If you have a ESP self cancelling ring, it has to be installed as shown below to zero it out. It has a 0 degree position, 360 degree position and 720 degree position. DON'T rotate it more than you have to to get to the Gold window, 0 degrees otherwise you'll damage the ribbon cable inside it.


Note arrow pointing to the 2 O'clock position, and notice the window is gold, this is the 0 degree position.


If the self cancelling ring is rotated 360 degrees, the window turns gray, this is the 360 degree position.


This is one more turn, it turns black, this is the 720 degree position. If it is turned another 360 degrees, it goes back to gold.


When installing a new ESP self cancelling ring, make sure you can see the gold window before installing the steering wheel. If you buy a new self cancelling ring, it will be in this position with a locking mechanism that needs to be broken off to prevent it from moving from this position.

Make the New Wiring Harness
You will need to add a new wiring harness to add the lighting and shifter functions on the steering wheel. Get electrical connector
4B0 973 605 from you dealer, it's about $10. Using (4) 60" lengths of different color wire, push the wires into the electrical connector as shown below. The connector has insulation displacement connections built into it. Once you push the wire firmly down into the gate, use a multi meter to check continuity from one end to the other. If needed, use a pin or small paper clip to touch the connector end.

Slide the other half of the connector on, it goes from left to right where the wires go front to back.


Just push the wires down into the connector, they will cut the insulation and make a connection. You need small diameter wire, about 22-24 gage.


Push the four wires in positions 1-4, leave 5 empty. Look on the back side of the connector, you'll see the numbers.


Completed harness with other half of electrical connector slid on.

Now that you have the parts and the wiring harness, all you need to do is to install them. First, you will remove the airbag using the procedure here. Make sure you take all the covers off the steering column as described. I don't disconnect the battery any longer, but do what you feel comfortable with. Once the airbag is off, unplug the electrical harness and remove the holding nut or 12mm triple square and mark the wheel with a sharpie so you know where to put the new wheel. You'll see a vertical notch on your existing wheel at 12 o'clock, mark the steering shaft at that position.


Airbag connector. You must first pop the section off (as shown), then once it is removed you can unplug it. Or just unplug it from the self cancelling ring.


12mm triple square tool used for steering wheel nut removal.


Remove the self cancelling ring. It should have 4 clips on the back of it holding it to the column. Be careful not to break the clips.


Remove the yellow wiring harness from the self cancelling ring, you probably won't have anything else going to it. If you have a pre facelift car, your self cancelling ring will most likely look like this, but I'm not sure as I have never seen one.


Self Cancelling Ring - No ESP removed from 1998 A8


If you use an ESP self cancelling ring on a pre facelift A8, you'll need to cut back some of the parts so the covers fit.


Installing Wiring Harness
Download the wiring diagrams here. Please right click and "choose save target as".

You now need to run the wiring harness from the self cancelling ring to the tiptronic shifter and to a light switch for illumination power on the wheel. First off, remove the passenger side panel as described here so you have access to the shifter wiring (it's going to be tight). Or as an alternate method, you can connect the wires in the electronics box, shown later in this procedure. Remove the lower dash panel shown here. You will also need to remove one switch from above the radio so you can tap the instrument wiring.

Run the wiring harness down the steering column, there is one in place already. Use hockey tape (friction tape) to secure the wires. This is better than tie wraps because it won't chaff anything. You can get the friction tape at any hockey supply store.


New wiring harness in place (orange, red, green, blue wires).


Route positions 1, 2 and 3 of the electrical connector on the self cancelling ring (4B0 973 605 Electrical Connector) to the passenger side of the shifter. This is the ground, tip up and tip down wire.

Position 4 should be routed up to a dash switch for illumination power.

These wires should be connected as follows:


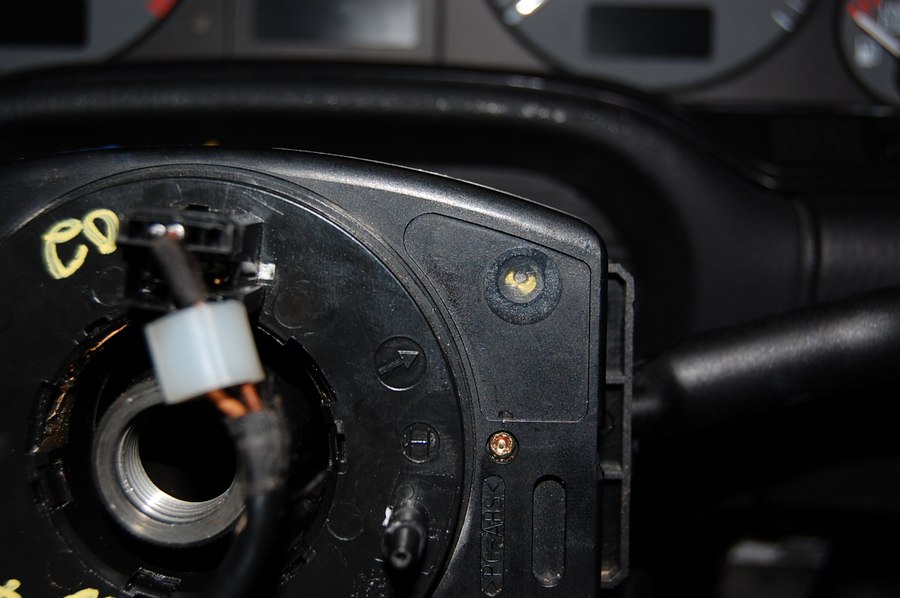
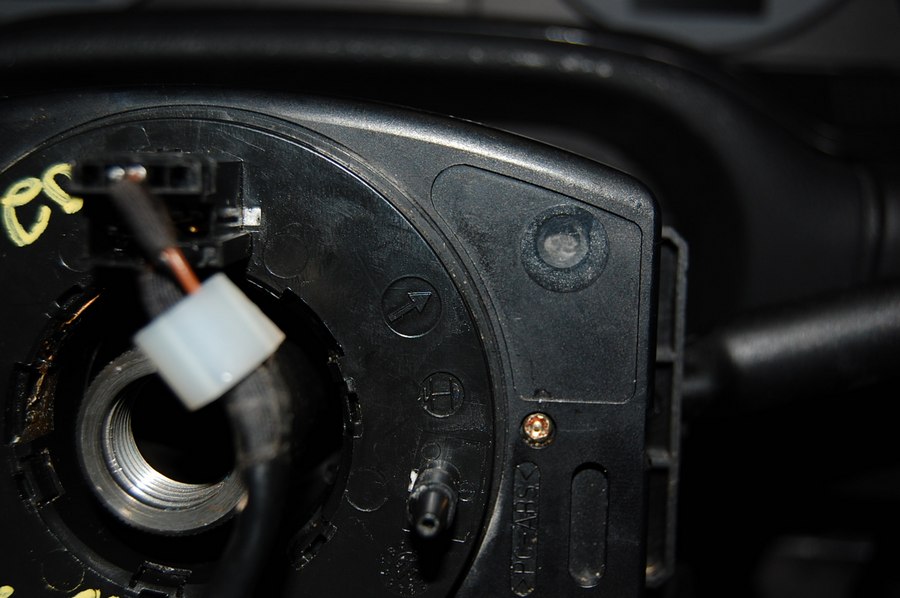
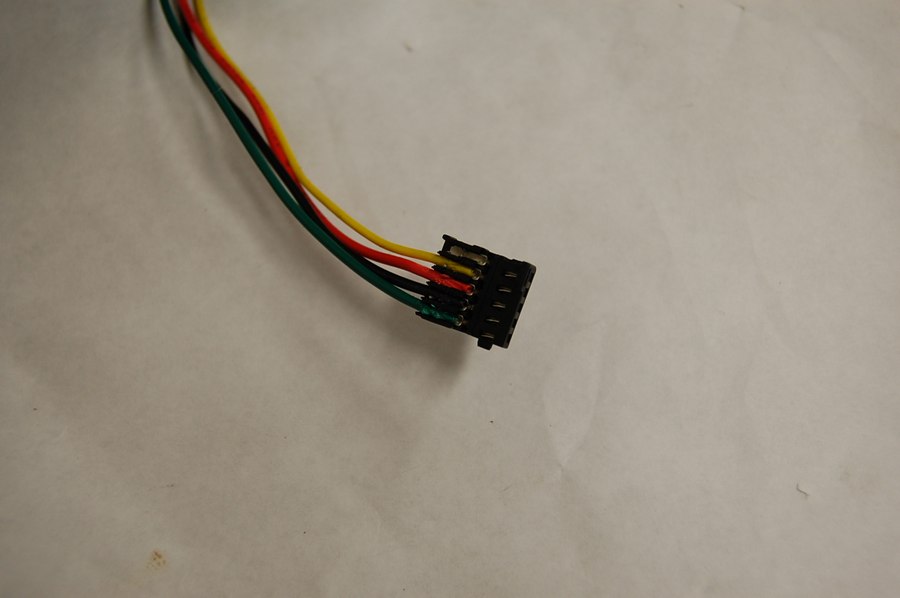
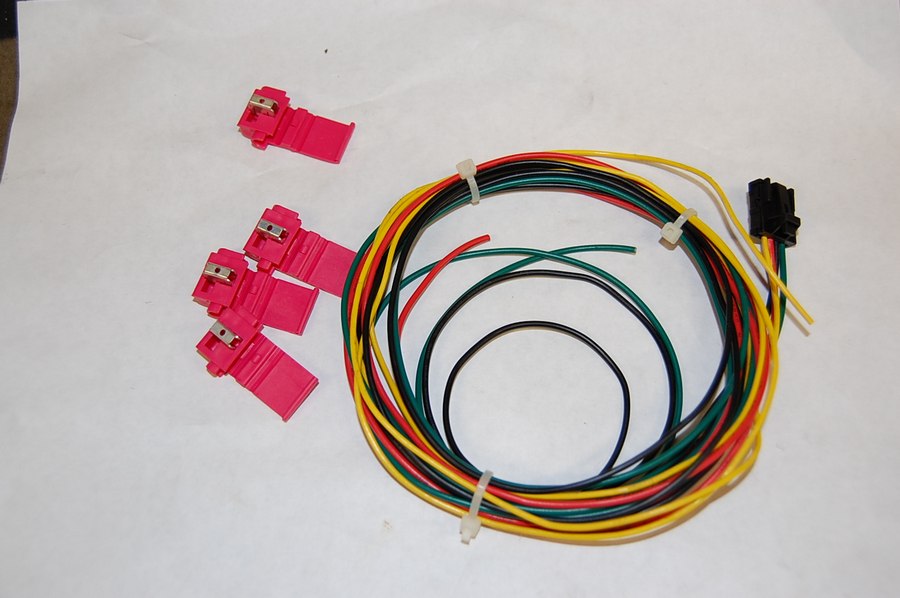
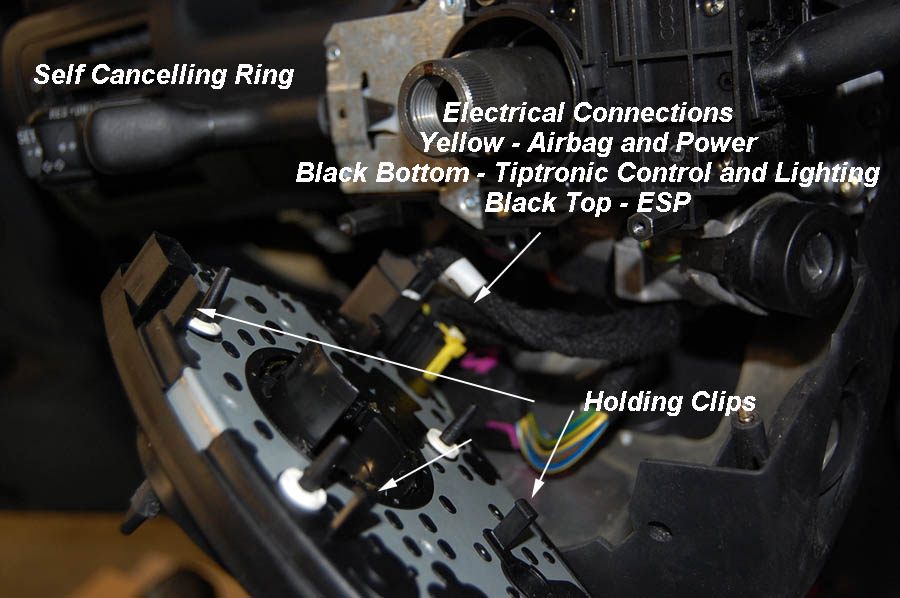
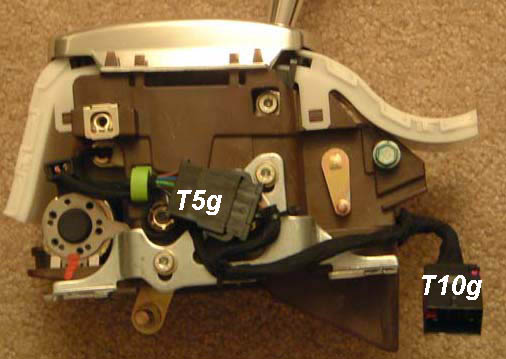
Self Cancelling Ring to Tiptronic Wiring
Wire Function Self Cancelling Ring Connector Position Connect To
Ground 2 T10g/6 (brown/black on vehicle side of connector)
Tip Up 3 T10g/8 (yellow/blue on vehicle side of connector)
Tip Down 1 T10g/7 (yellow/green on vehicle side of connector)


Tiptronic shifter, passenger side (LHD). Please note connector numbers. Wire colors change across the connectors as shown in the wiring diagrams. Vehicle side of T10g would plug into the "tiptronic shifter" side shown here.


Wiring harness attached to existing harness.


The wiring can also be made in the electronics box as shown in the wiring diagrams and the procedure here. See "alternate method of connections in electronics box" on the wiring diagrams.

The easiest way to make the connections would be to use insulation displacement connectors. To properly use insulation displacement connectors, put the two wires in the connector, and using a pair of needle nose or regular pliers, push the metal piece down into the wires. Once it is completely pushed down in place, fold the cover over and clip in place with pliers.

To wire the lighting, just take position 4 of the self cancelling ring and attach it to any dash switch in the center console by using an insulation displacement connector to the grey/blue wire. This is the A19 bus, which is instrument lighting. This way the steering wheel tiptronic control lights will be on all the time the headlights are switched on. Nice touch at night.

If you car has ESP, you'll need to recalibrate the steering wheel sensor, as shown here on the ross-tech.com page.

Reassemble the car and enjoy your new tiptronic shifter!


Technical & Maintenance  |  Upgrades & Style  |  Used A8 Buyer's Checklist

Marketplace  |  On Track  |  Gallery  |  Links |  Contact |  Home